Showing posts with label Winnie and Walter. Show all posts

Tuesday, February 14, 2023

happy valentine's day 2023

Lordy, lordy look who hasn't posted for two months! Not sure anyone cares, but if nothing else but to remind myself sometime down the road here's why... I'm not making as many cards lately. I make the occasional one that is necessary (Valentine for example) and otherwise use up ones from my stash. More on that later.


This was the Valentine I made for DD this year. I was inspired by something Heidi Swapp created. Did you see this fun piece in her reel? I love the little interactive window elements. I used another of Heidi's ideas from another piece and included "5 things I love about you." Three in the windows on the front and two on little pull out tags in a pocket inside.


I pulled out all kinds of supplies from my stash - PP to stamp on, stamps, dies, inks, colored pencils, twine. All the things. Loved the process. Hated the clean up :) 

On a side note, something keeping me busy lately is getting my stamps and dies into the Evernote app so that I have an overview of what I actually own. And for a project like this it would have been very helpful to use Evernote to see which Valentine/love/vintage etc stamps I own instead of flipping through everything.  I own a shitload, actually, but alas they're not all in Evernote yet. 

When I have everything inventoried, I aim to destash about a third of my shitload. Just keep watching ;) 

Here are DH and DS versions.


What has actually been taking up my time more recently is a foray into the world of memory planning. An oxymoron if I ever heard one, but I'm learning to live with it ;)

Are you a planner? I am the world's worst planner. Ever. So why would I get into memory planning? My cousin introduced me on to the Heidi Swapp memory planner world and by golly it's a great idea. It's basically scrapbooking daily life in a simple format - photo driven with some journaling to record the memories and some decorating just for fun. Heidi calls the process "Stop the Blur" as in keep track of everday life so when people ask you what you did last Tuesday you can actually answer. You can check out the idea here

So before jumping into it (and buying all the things) I decided to give it a try using a notebook from the dollar store and supplies I already have. I print photos at the drug store and pop them into my book often hidden in interactive elements. Here's a peek. 


Full disclosure, I just recently did buy all the things :) I've been enjoying this process this since last fall so I'm gonna make the switch to Heidi Swapp's memory planner format. If you are a memory planner, I'd love to hear any of your tips for a newbie!!!

Tuesday, October 11, 2022

mini accordion album - what fun!

So did you see the first ever SBCfest over at Scrapbook.com? I happened to catch some of the videos and in this one Andrea L totally inspired me to give a mini album a try. I had never created one of these! SUCH fun. 

So many ideas. So many supplies. So many hours ;) I'm just going to share some photos of the completed project. It's on its way to Australia as we speak.


Action Deutschland PP
Essentials by Ellen rectangle dies
Renke numbers die
Waffle Flower greenery die
PTI tag dies
Lawn Fawn Milo alpha stamp
 inks, vellum, stickers, washi, sequins, pearls

Unfortunately I'm way too late for her birthday so I decided a little book to record this moment in time could be fun too rather than a card. I used the letters of her name in page titles (9 plus cover) with interactive pieces for lists of favorites - movies, fashion, eats, etc. Also included a few pages where she can add special photos - her at 30, her cake, etc. Used all the fun techniques too - shaker, flaps, belly band, pockets.

Hope she has as much fun completing it as I had making it! Have you ever made one of these? If not, I strongly recommend it. How about in a smaller size to hold a gift card? I know there are more of these in my future ;)

I'm playing at:
Happy Little Stampers - AG with Dies October
Cut it Up - #262 Big


Wednesday, August 3, 2022

commissioned birthday cards

And today's summer programming, more commissioned birthday cards. 

Requested for a brother whose car is his pride and joy. I made three to choose from...

TAWS car stamp
Artemio cityscape stamp
Winnie and Walter sentiment stamp

Right at Home Holidays are on the Way die
washi tape

Renke die
Inkystamp sentiment
alcohol ink background, embossing powder

And for a butcher ;)

Neat and Tangled Hot Dog stamp
Inkadinkado sentiment

Have a great week!

Friday, February 14, 2020

STAMPlorations release - reprise

Hope you're all having a sweet Valentine's Day. No Valentine for you here today. There's a new release in town over at the STAMPlorations shop. Have you seen it? And did you see all the DT makes this past week?

Remember Leafy?

And this card I made with it?


I mentioned the leftovers I had after die cutting those tags from the light and middle blue panels...

Leafy stamp
Manila Tags die
Winnie and Walter Hello die
sequins, washi, PP snippet

I took those panels, layered them over one another and adhered a snippet of PP behind. Stitched the panel onto a cardbase and added a strip of washi along the bottom. Added a die cut sentiment and sequins.

Gotta love leftovers ;) There's still time to check out all the DT's creations over at the STAMP blog. And leave comments, there are prizes to be won - a $20 gift code and a stamp set from the release.

In addition, the four new stamp sets being released are 10% off automatically until February 19. If you use my STAMPGIRLMARIA designers' code you'll get an extra 20% off too!

Thanks for stopping by.

Thursday, October 10, 2019

simon says stamp - marie snowflake

Of course as I was typing the title of my post I typed "Maria Snowflake" by mistake ;)

Imagine my delight when I received the "Marie Snowflake" (just misspelled it again!) to play with for the Cheer and Joy release over at Simon Says Stamp.

I'm gonna share my design process with you for the cards I created using this snowflake die. Using it only as die cuts. I'd planned to die cut it from foam and do some stamping with it too, but the interrupted-by-rainy-days grape harvest got in the way.

So, needing to jumpstart my mojo, I googled Christmas trends for 2019. This site provided all the inspiration I needed ;)

First up. Pastel Christmas.


SSS Marie Snowflake die
vellum, sequins
distress inks

I watercolored a panel of watercolor paper, die cut it and adhered vellum die cut snowflakes loosely all over the panel. Added some sequins and a heat embossed sentiment.


And then... Modern Christmas.

Christmas Decor Trends Of 2017

 SSS Marie Snowflake die

This design was super easy. Die cut the snowflake in bright colors and adhered them around the edge of the cardbase. Trimmed off the excess (actually made a second card with them) and added the "fa la la" die cut from white with a silver mirror card shadow.


Thanks for looking. You can check out all the new products in the Cheer and Joy release here and all the lovely makes with the products in this gallery.

I'll be back on Saturday with three more cards with this die. Hope to see you then.

I'm popping by:
SSS Wednesday Challenge - Christmas
Happy Little Stampers - AG with Dies

Sunday, June 9, 2019

when you're swatching your new catherine pooler inks... part 4

So the other day I finally got around to swatching my new Spa Collection inks from Catherine Pooler. And I had some time on my hands so I had a play...

Meet the fifth and sixth card to emerge from this playtime.


This design is basically the same as yesterday's, just with different colors. I was aiming for a modern Christmas vibe. (DD doesn't think it'll fly, but oh well.)

I used an old solid square wooden stamp and a Stampamajig to create my backgrounds. Again, each square only has one layer of ink. Can't beat the coverage. I then stamped the little images with the same colors to get the tone-on-tone result.

I used solid images from various Christmas sets and sentiments from Technique Tuesday and Inkystamp.

Tomorrow's makes are CASEs of Lisa S. working with The Stamp Market hexagons.

Today I'm hooking up at:
Christmas at Sweet Stampin - June AG option non-traditional colors
Watercolor Wednesday - AG Feminine
Crafty Hazelnut's Christmas Challenge - AG
STAMPlorations - CAS Challenge

Wednesday, March 13, 2019

light and airy confirmation card

Stopping by today with a card I made for a confirmation. I was inspired by this card. Check out Silke's grid on IG if you're feeling in the mood for light and airy collage design... She does it like no one else.

I do not have as light a hand as Silke, but I used up a little more PP  ;)

Charlie and Paulchen Sommer Trio die
Heidi Swapp gold ink spray
Studio Calico PP


Basically, I just pulled out a PP pad and some dies which I thought fit the confirmation theme. Die cut some pieces and then spent way too much time arranging and rearranging them until I got something I was happy with ;)

Thanks for looking. Have a great week.

I'm joining:
Die Cut Divas - Anything Goes
Happy Little Stampers - AG with Dies March

Saturday, December 1, 2018

more faux metallic for christmas

Did you see my makes yesterday? I made a couple Christmas cards with an oldie but goodie technique. A great idea for adding a metallic touch to a project is Perfect Pearls. With the faux metal technique (a la Jennifer M.) you brush them onto a Distress Inked area while it is still damp. I thought I'd give the technique a try with Distress Oxides.

So the Oxides have a longer open time than the Inks. And therefore will pick up even more of the Perfect Pearls powder if you lay it on too heavily. Like I did. Got some mega streaks. Oh well.

But a positive side effect is that after using a water/Perfect Pearls mixture in a mini mister to lightly spray the finished area and set the Perfect Pearls, the oxidation droplets appeared where there were larger water droplets and that's kinda cool!

When the inked/pearlized panel was dry I die cut the rectangles and then dry embossed them. Die cut some iconic Christmas figures and heat embossed some sentiments and then assembled my cards.


Distress Oxides - Lucky Clover, Cracked Pistachio
Perfect Pearls

Still love this technique. And those embossing folders. I'm in the middle of Christmas cookie baking. How about you?

I'm playing at:
CAS on Friday - Make a holiday card
SSS Wednesday Challenge - AG
SSS Work it Wednesday - Ho Ho Holiday

Friday, November 30, 2018

faux metallic for christmas

Christmastime is sparkle time, right?

I made a few more Christmas cards with an oldie but goodie technique. A great idea for adding a metallic touch to a project is Perfect Pearls. With the faux metal technique (a la Jennifer M.) you brush them onto a Distress Inked area while it is still damp. I thought I'd give the technique a try with Distress Oxides.

So the Oxides have a longer open time than the Inks. And therefore will pick up even more of the Perfect Pearls powder if you lay it on too heavily. Like I did. Got some mega streaks. Oh well.

But a positive side effect is that after using a water/Perfect Pearls mixture in a mini mister to lightly spray the finished area and set the Perfect Pearls, the oxidation droplets appeared where there were larger water droplets and that's kinda cool!

When the inked/pearlized panel was dry I die cut the rectangles and then dry embossed them. Die cut some iconic Christmas figures and heat embossed some sentiments and then assembled my cards.


Distress Oxides - Lucky Clover, Cracked Pistachio
Perfect Pearls

Still love this technique. And those embossing folders. Come back tomorrow for the red versions.

I'm playing at:
SSS Wednesday Challenge - AG
SSS Work it Wednesday - Ho Ho Holiday


Friday, November 23, 2018

25 days of christmas tags 2018 - part 5

So while you're all enjoying leftovers, I'm back with the last of the sets of tags I'm making as neighbor gifts this year (14 of 'em)... thanks to Tracey's 25 days of Christmas tags.

Meet my last two sets. Who knows? Maybe there'll be more but for now I have to stop and clean up my craft room table cuz it needs to come up to the living room for our Thanksgiving dinner on Sunday!

If this tag looks familiar to you, you're right. I decided to make a second set with the same design, just dressed it up with a chiffon bow and made some smaller tags to go with them.

I was inspired by Kim's tag for Day 11 with Winnie and Walter, but used one of my all-time fave Christmas sets from Technique Tuesday who was up on Day 13.


Reverse Confetti Gift Card Holder Tag die
Technique Tuesday Jingle all the Way stamp
Altenew inks

For my last set (actually made two sets of these cuz I was having fun coloring the cute images) I was totally inspired by Tracey's tag for Day 11 with Winnie and Walter.  Such a simple way to create a cute little scene, perfect for families with kiddos.


Love that extra irridescent sparkle the snow sequins add to the heat embossed falling snow.


Papertrey Tag Sale #2 die
Winnie and Walter So Tweet stamp and die
Winnie and Walter Sentimental Winter stamp
Create a Smile Schone Bescherung stamp
Copic markers
sequins

So I'm off. Have a date with a bird and all its trimmings...

I'm also joining in at:
SSS Wednesday Challenge - Baby it's Cold Outside (#2)
Happy Little Stampers - AG with Dies November (#2)

Thursday, November 22, 2018

25 days of christmas tags 2018 - part 4

Happy Turkey Day! I'm back with more of the sets of tags I'm making as neighbor gifts this year... thanks to Tracey's 25 days of Christmas tags.

Meet my next three sets.

I still couldn't get Day 7 with Birchpress (whose product I do not own unfortunately) and Desiree's color choices for her layered ornament out of my head. So I gave it another try with another new-to-me die. Die cut the layers from kraft, white, silver and gold. Easy peasy.


And made some smaller sticker tags too since I had some leftovers from my plays at which color to make which layer.

Spellbinders Ironworks Motifs die

Next I was inspired by Day 12 with Pretty Pink Posh and Angela's shaker ornament. I broke out this really intricate die and concocted a shaker ornament out of it with a variety of gem tone sequins behind vellum rather than acetate.


Decorated these smaller tags using a hole punch on the negative pieces of mirror and glitter CS!


Technique Tuesday Jingle all the Way stamp
Precious Remembrance Sketchy Christmas stamp

vellum,sequins

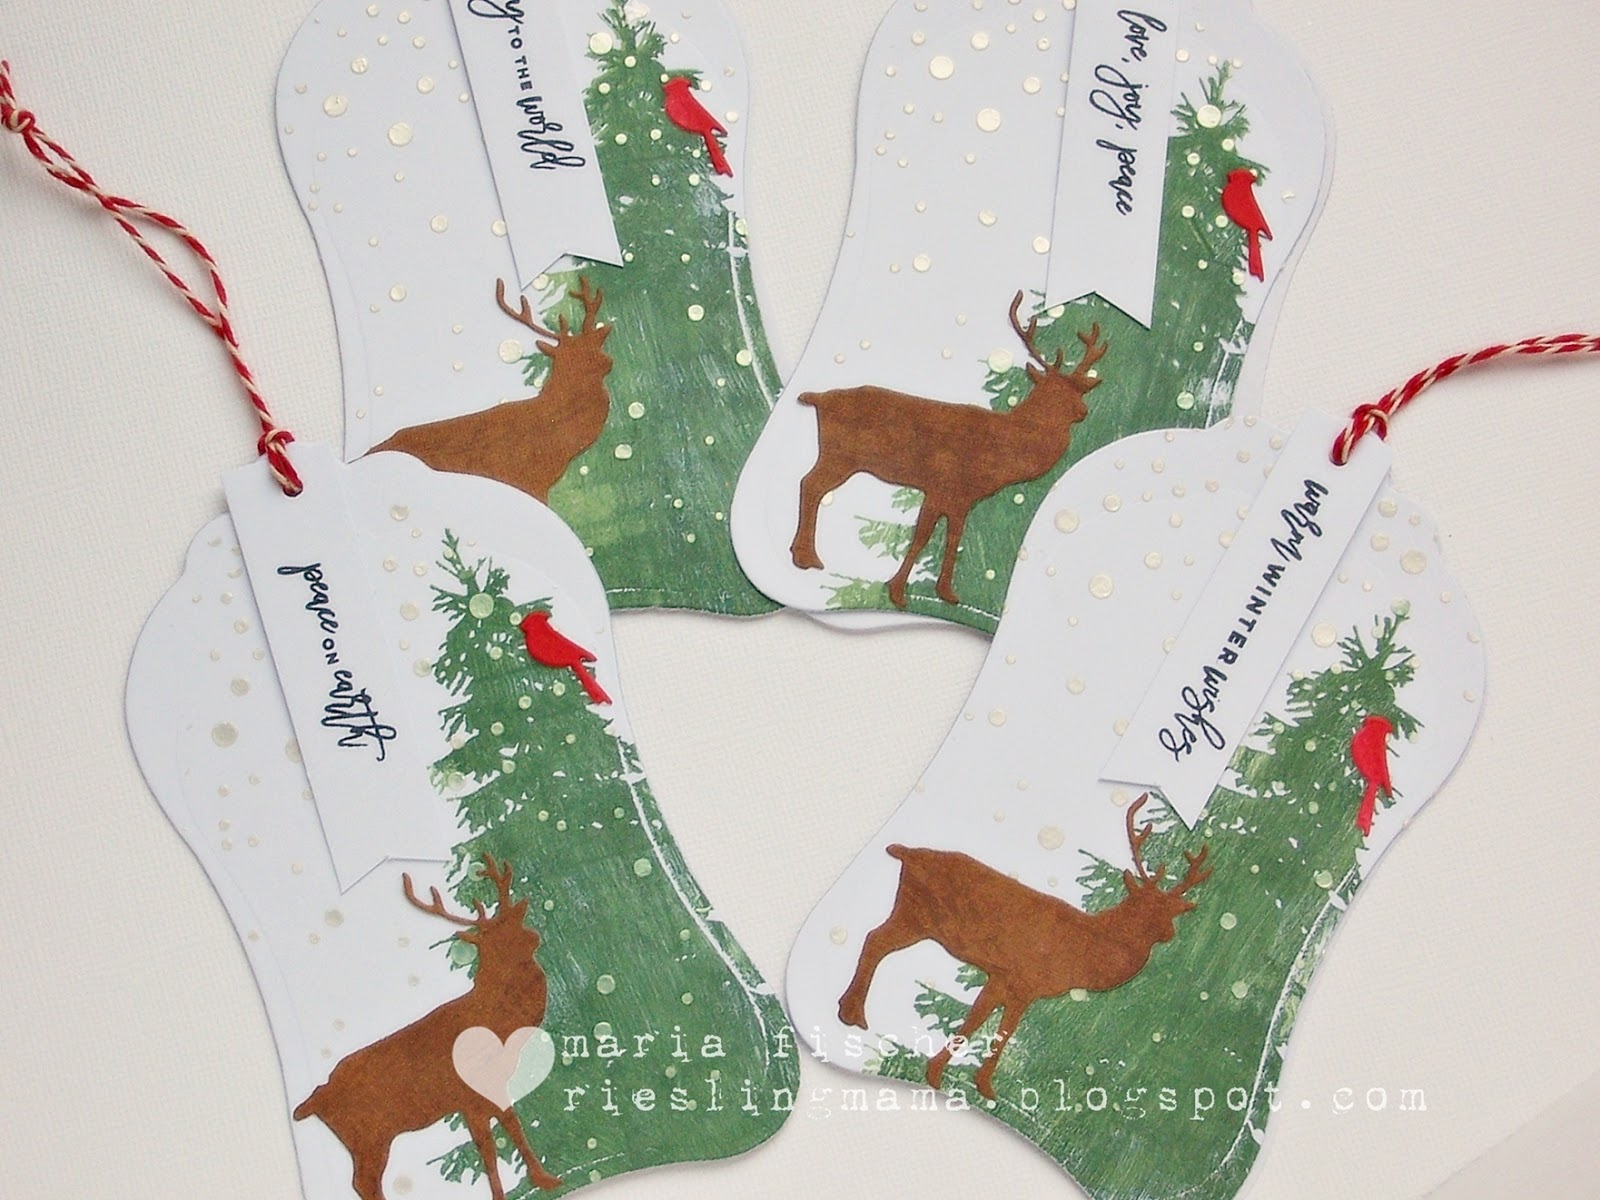
And then I actually pulled out some Winnie and Walter (Day 11) and kinda came up with my own designs although Shay's tags with the touch of woodgrain pushed me in the direction of one certain stamp set. Hope you likey.


Winnie and Walter Winter Woodland stamp
Winnie and Walter Sentimental Winter stamp
SSS Falling Snow stencil
embossing paste
Altenew inks
sparkle and gold embossing powders
Impression Obsession Birch Trees die
STAMPlorations Luggage Tag die
stag die

I'm joining in at:

SSS Wednesday - Baby it's Cold Outside (#3)
City Crafter - Tag (#3)
Die Cut Divas - AG (#1,2)
Happy Little Stampers - AG with Dies November (#2)