Showing posts with label Technique Tuesday. Show all posts

Tuesday, June 18, 2019

sympathy card series - part 4

Recently I created eight sympathy cards as I needed to a) create the perfect card for someone I know as well as b) increase my dwindled stash.

In my crafting session I revisited a couple sympathy card designs I really like, here and here. Today's are two more using the ink smooshing with acetate technique.


Distress inks in Old Paper, Antique Linen and Frayed Burlap. Somehow I don't like the smooshed result as much as I did the look of them paired up on my swatches. Oh well. I thought I could use a couple cards with a more sombre color scheme...


Sunday, June 9, 2019

when you're swatching your new catherine pooler inks... part 4

So the other day I finally got around to swatching my new Spa Collection inks from Catherine Pooler. And I had some time on my hands so I had a play...

Meet the fifth and sixth card to emerge from this playtime.


This design is basically the same as yesterday's, just with different colors. I was aiming for a modern Christmas vibe. (DD doesn't think it'll fly, but oh well.)

I used an old solid square wooden stamp and a Stampamajig to create my backgrounds. Again, each square only has one layer of ink. Can't beat the coverage. I then stamped the little images with the same colors to get the tone-on-tone result.

I used solid images from various Christmas sets and sentiments from Technique Tuesday and Inkystamp.

Tomorrow's makes are CASEs of Lisa S. working with The Stamp Market hexagons.

Today I'm hooking up at:
Christmas at Sweet Stampin - June AG option non-traditional colors
Watercolor Wednesday - AG Feminine
Crafty Hazelnut's Christmas Challenge - AG
STAMPlorations - CAS Challenge

Friday, November 23, 2018

25 days of christmas tags 2018 - part 5

So while you're all enjoying leftovers, I'm back with the last of the sets of tags I'm making as neighbor gifts this year (14 of 'em)... thanks to Tracey's 25 days of Christmas tags.

Meet my last two sets. Who knows? Maybe there'll be more but for now I have to stop and clean up my craft room table cuz it needs to come up to the living room for our Thanksgiving dinner on Sunday!

If this tag looks familiar to you, you're right. I decided to make a second set with the same design, just dressed it up with a chiffon bow and made some smaller tags to go with them.

I was inspired by Kim's tag for Day 11 with Winnie and Walter, but used one of my all-time fave Christmas sets from Technique Tuesday who was up on Day 13.


Reverse Confetti Gift Card Holder Tag die
Technique Tuesday Jingle all the Way stamp
Altenew inks

For my last set (actually made two sets of these cuz I was having fun coloring the cute images) I was totally inspired by Tracey's tag for Day 11 with Winnie and Walter.  Such a simple way to create a cute little scene, perfect for families with kiddos.


Love that extra irridescent sparkle the snow sequins add to the heat embossed falling snow.


Papertrey Tag Sale #2 die
Winnie and Walter So Tweet stamp and die
Winnie and Walter Sentimental Winter stamp
Create a Smile Schone Bescherung stamp
Copic markers
sequins

So I'm off. Have a date with a bird and all its trimmings...

I'm also joining in at:
SSS Wednesday Challenge - Baby it's Cold Outside (#2)
Happy Little Stampers - AG with Dies November (#2)

Thursday, November 22, 2018

25 days of christmas tags 2018 - part 4

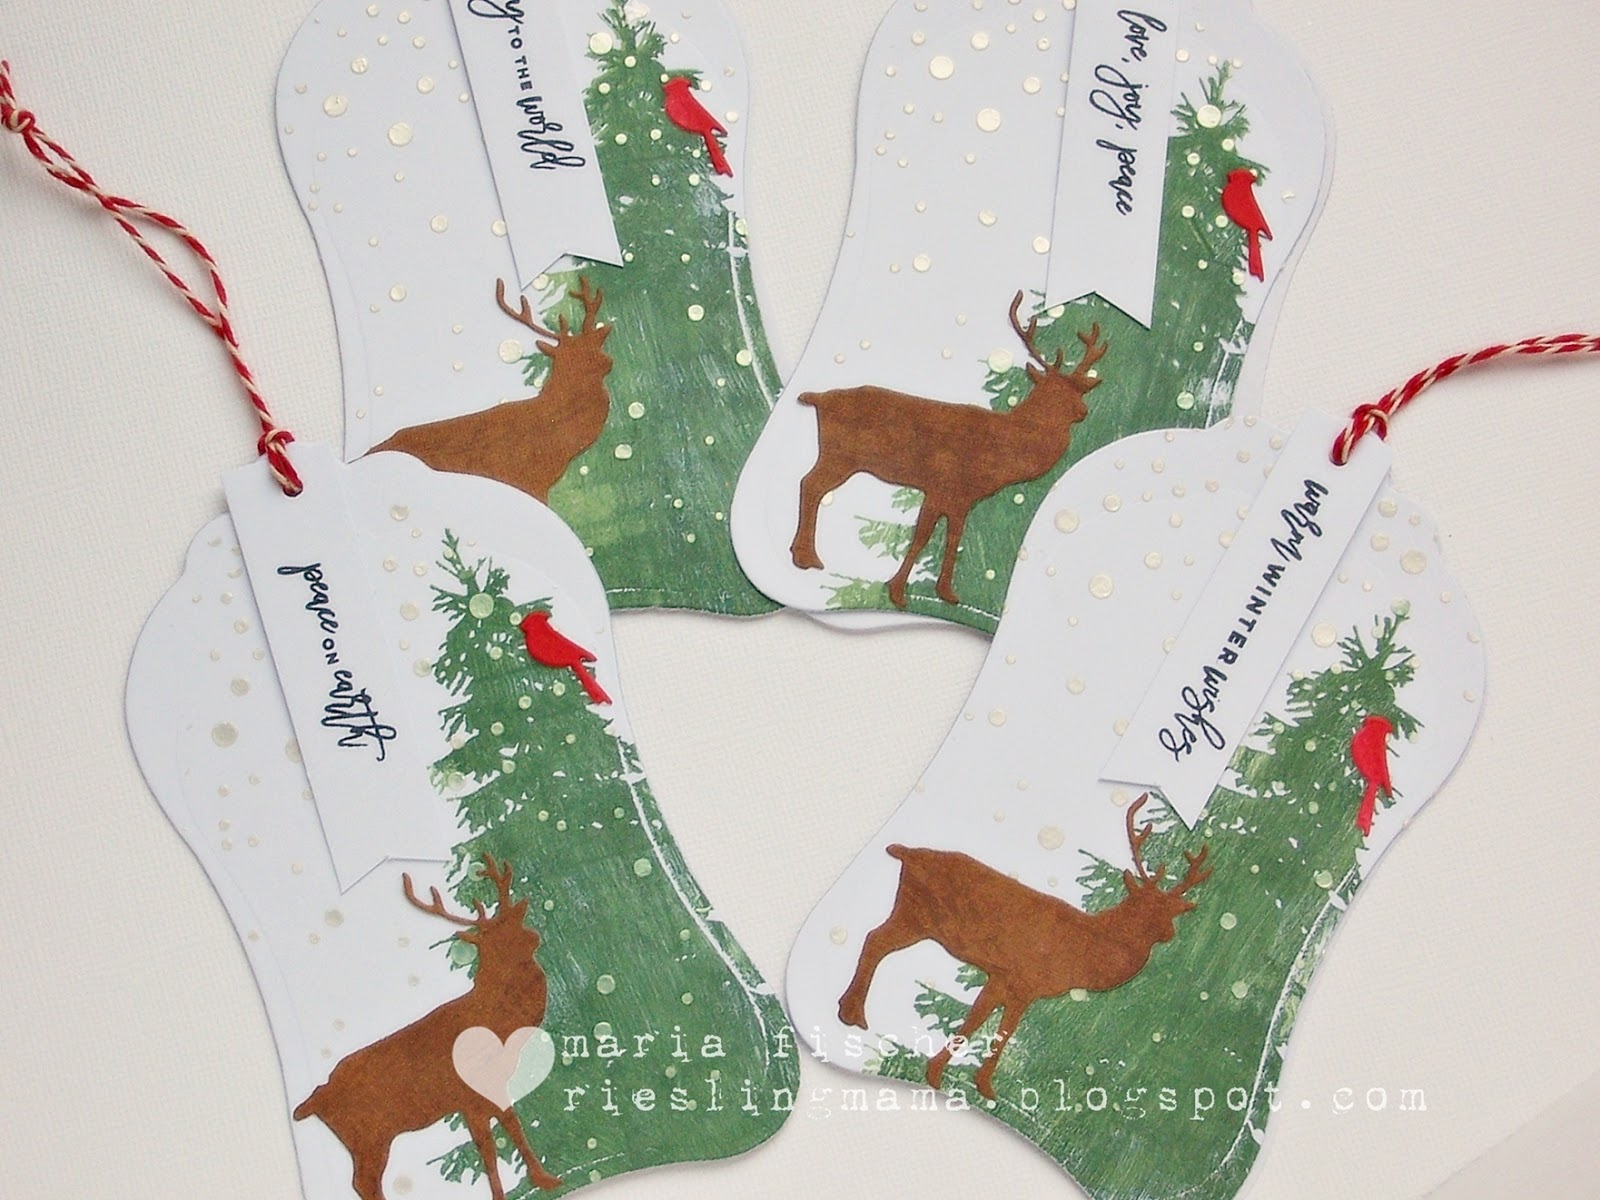
Happy Turkey Day! I'm back with more of the sets of tags I'm making as neighbor gifts this year... thanks to Tracey's 25 days of Christmas tags.

Meet my next three sets.

I still couldn't get Day 7 with Birchpress (whose product I do not own unfortunately) and Desiree's color choices for her layered ornament out of my head. So I gave it another try with another new-to-me die. Die cut the layers from kraft, white, silver and gold. Easy peasy.


And made some smaller sticker tags too since I had some leftovers from my plays at which color to make which layer.

Spellbinders Ironworks Motifs die

Next I was inspired by Day 12 with Pretty Pink Posh and Angela's shaker ornament. I broke out this really intricate die and concocted a shaker ornament out of it with a variety of gem tone sequins behind vellum rather than acetate.


Decorated these smaller tags using a hole punch on the negative pieces of mirror and glitter CS!


Technique Tuesday Jingle all the Way stamp
Precious Remembrance Sketchy Christmas stamp

vellum,sequins

And then I actually pulled out some Winnie and Walter (Day 11) and kinda came up with my own designs although Shay's tags with the touch of woodgrain pushed me in the direction of one certain stamp set. Hope you likey.


Winnie and Walter Winter Woodland stamp
Winnie and Walter Sentimental Winter stamp
SSS Falling Snow stencil
embossing paste
Altenew inks
sparkle and gold embossing powders
Impression Obsession Birch Trees die
STAMPlorations Luggage Tag die
stag die

I'm joining in at:

SSS Wednesday - Baby it's Cold Outside (#3)
City Crafter - Tag (#3)
Die Cut Divas - AG (#1,2)
Happy Little Stampers - AG with Dies November (#2)


Wednesday, November 21, 2018

25 days of christmas tags 2018 - part 3

I'm back with more of the sets of tags I'm making as neighbor gifts this year... thanks to Tracey's 25 days of Christmas tags.

Meet my next three sets.

Indulge me and my delusions of grandeur for a moment. I am now thoroughly convinced that the MISTI and the Jingle all the Way stamp from Technique Tuesday were designed with ME and THIS  tag set in mind!!!!

Well, OK. Probably not. But this was SUCH fun to make. I was inspired by Kim's tag for Day 11 with Winnie and Walter, but used one of my all-time fave Christmas sets from Technique Tuesday who was up on Day 13. And I even used up some more PP by cutting a second layer for the "to" "from" area ;)


Reverse Confetti Gift Card Holder Tag die
Technique Tuesday Jingle all the Way stamp
Altenew inks
jingle bells, buttons, ribbon

For Day 7 with Birchpress (whose product I do not own unfortunately) I was totally inspired by Desiree's color choices for her layered ornament. I couldn't get it out of my head, but didn't know how I could recreate that look with product I own. So I couldn't really, but I came up with this.


Die cut the layers from kraft, white, silver and gold and then dry embossed all but the kraft (which has to "to" "from" area on the back). They are really cool IRL so I left a sentiment off to keep the clean look. Made these smaller tags for the set too. Great little snowflake die in that Little B set.

Little B Holiday die
We R Memory Keepers Geometric embossing folder

For Day 15 with STAMPlorations, I absolutely loved Carol's die cut tags and had to CASE them of course. Wish my photos were as gorgeous as hers!


STAMPlorations Christmas Icon Nativity die
STAMPlorations Christmas Icon Angel die
STAMPlorations Gift Builder #2 die
STAMPlorations Two Reindeer die
gold glitter CS, Delicata gold ink

I think they'll look so pretty on kraft gift wrap. Keeping them neutral lets the shape speak for itself. Thanks for the idea Carol.

I have more. Still happy Tracey's challenge spurred me to create my neighbor gifts for Christmas in November, though I'm behind the eight ball prepping for our turkey feast on Sunday! 

I'm also joining in at:
Addicted to CAS - Presents (these are all presents for neighbors, but #3 has present tags!)
Basteltraum - Winter/Christmas (#2)
Die Cut Divas - AG (#3)
Happy Little Stampers - AG with Dies November (#2)


Friday, September 14, 2018

altenew layered lily for a sympathy card

Summer programming...

Here's a sympathy card I made for a friend. I thought it fitting to CASE a card of hers.

Altenew inks
vellum
sponge daubers

On PP I made some splotches with various inks and sponge daubers. Heat embossed the sentiment onto vellum and stitched it loosely to the card front. Stamped the lily and spritzed with perfect pearl mix before adhering with foam tape. Subdued. Yet pleasant.


Back in Deutschland and getting caught up. End of the summer programming!

Wednesday, March 21, 2018

alcohol inked and bloomtangled

I think I've mentioned before that it's rare that I see a card in blogland and then run right down to my craft room to make something! It happened recently though.

Saw this amazing card by Janette K as part of the Spellbinders blog hop. It occurred to me that I could do something similar using a cover plate die. AND one of the alcohol ink on Yupo backgrounds I'd just created (maybe you saw these on IG). I'm so proud of myself. I used a BG right away! That doesn't happen often either when I get into one of those create-a-zillion-BGs moods.

digital PP
alcohol ink Watermelon, Red Pepper, Sunshine Yellow
white embossing powder
circle punch

I was so impressed with Janette's use of the bold red colors I just trimmed the full die cut down to have only the bloom and a couple leaves. I traced it onto my Yupo and then used scissors to cut that panel. Glued them together with Multi Matte medium.

I loved the use of B/W in the form of the sentiments randomly stamped on the original card, but decided to use black for my die cut and bring in the B/W with the PP. Love that sentiment stamp.

Come back tomorrow for another card along these lines. Used that warped Yupo BG I created in cool tones...

I would like to take this to:
Simply Papercraft - Anything Goes March
Happy Little Stampers - AG with Dies March

Sunday, February 25, 2018

summer's in the air!

OK. Not really. But my venture into spring cards has led me right down the road to tropical cards. Actually it was the palm PP in this kit that gave me the idea.

There's the perfect palm branch stamp in Flora and Fauna's Flamingo Pool Party. The rest just happened! Boy, did I have fun creating these...

Studio Calico PP
Versamagic Pink Grapefruit ink
printed acetate
washi

Randomly stamped the palm branch. Then I added some Moonstone embossing paste through the hibiscus stencil at the top for extra oomph. Since things were sparkly I decided to add shiny too. The negative from the sentiment die was a leftover so I filled it with a positive cut from PP. Added the gold polka dot washi strip at the bottom too. I sure love dressing up this VW Van!!!


Then I upped the fun factor.

Studio Calico PP
Distress ink
Gansai Tambi watercolors
sequins

Used PP for the VW van. Stamped and no-line watercolored the pool toy then masked it and brushed on some Tumbled Glass before adhering the van. Watercolored a sheet of paper green and then cut the leaves from it. Sequins as headlights cuz why not?!?


I'm cruising over to:
Simon Says Stamp Wednesday Challenge - Create your own BG (card #1)
Danipeuss Kartenchallenge - #63 Dots (#1)
Seize the Birthday - AG Birthday (#2)
Crafty Calendar Challenge -2 or more Layers (both)
Catch the Bug - Color Challenge (#1)


Wednesday, January 17, 2018

cat on a hot tin roof

I'm CAS(E)-ing a sketch for you today. Twice actually. My first idea did not turn out as I'd hoped. But I like what happened then.

Back to the beginning... I was lucky to win some Rubber Dance stamps over at Craft Stamper TIMI and I chose the whimsical houses designed by Susanne R. For some reason (never try to understand what goes on in my head... which reminds me... did you see this at Ellen Hutson?)...


...how 'bout that chocolate?!?... and while I was washing dishes and thinking about the framed-with-florals sketch and wondering how I could work whimsical houses into my creation, I remembered creating a village with masking like on this card and as the village came into my mind's eye so did the cat stamp I recently picked up as well as "cat on a hot tin roof" so it was a done deal. Lots of roofs and cats instead of florals. Following?

So I masked and stamped away. And stamped and fussy cut cats. And agonized for ages over the "frame". Geesh. What'd I come up with? A circle. Brilliant, eh? And the sentiment (I wasn't going to NOT use it, cuz punny), well it sure isn't the right size/shape. But. Please meet card #1.

distress oxides

Actually, I forgot to mention that I first spent an hour putting these Rubber Dance rubber stamps onto EZ Mount. Been ages since I'd done that! Remember that sticky goo?!? And while I was at it I did the same with some rubber stamps I ordered from Alisa Burke (know her?) ages ago. Um, yep. Finally. Surprised the rubber hadn't cracked. But that, my friends, remains for tomorrow's blog post... Stay tuned.

So. One of the stamps I'd mounted and cut was a trio of houses. A trio. Like the florals framing the frame on the sketch! Lightbulb. Meet card #2.

watercolors

Weird. I know. But me likey better. Used a snippet of gelli plate print for the die cut. And gave the houses a touch of watercolor. Dad's neighbors have sold their house. I think this may be heading their way.

So. Did I freak you out with the glimpse inside my head? If so, sorry. I'm playing at a couple other challenges too which may have added to my brain stress.

CASE this Sketch - #254
Rubber Dance - January
Simon Says Stamp Wednesday - Add a Sentiment
Pixie's Crafty Workshop - Snippets (circle frame and blue rectangle, "hello")