Showing posts with label Little B. Show all posts

Monday, November 14, 2022

STAMPlorations - christmas bundle

Hi there friends. I'm sharing a few Christmas cards I made with another bundle being offered at a super price over at STAMPlorations right now. 

You're probably aware that STAMPlorations owner, Shery, is battling cancer at the moment. To help bring a bit of revenue to her family while minimizing the amount of energy she has to put into packing and shipping, Shery has bundled some products at great prices. You can check out all the bundles on offer here.

I've worked with some Christmas phrase dies included in the Christmas Bundle - 2 cover plates and 8 phrase dies for $65.

I've used a favorite technique - repeat heat embossing - to pimp the phrases. On this first card I gave the sentiment three coats of embossing powder and adhered it right onto a card front covered with PP.
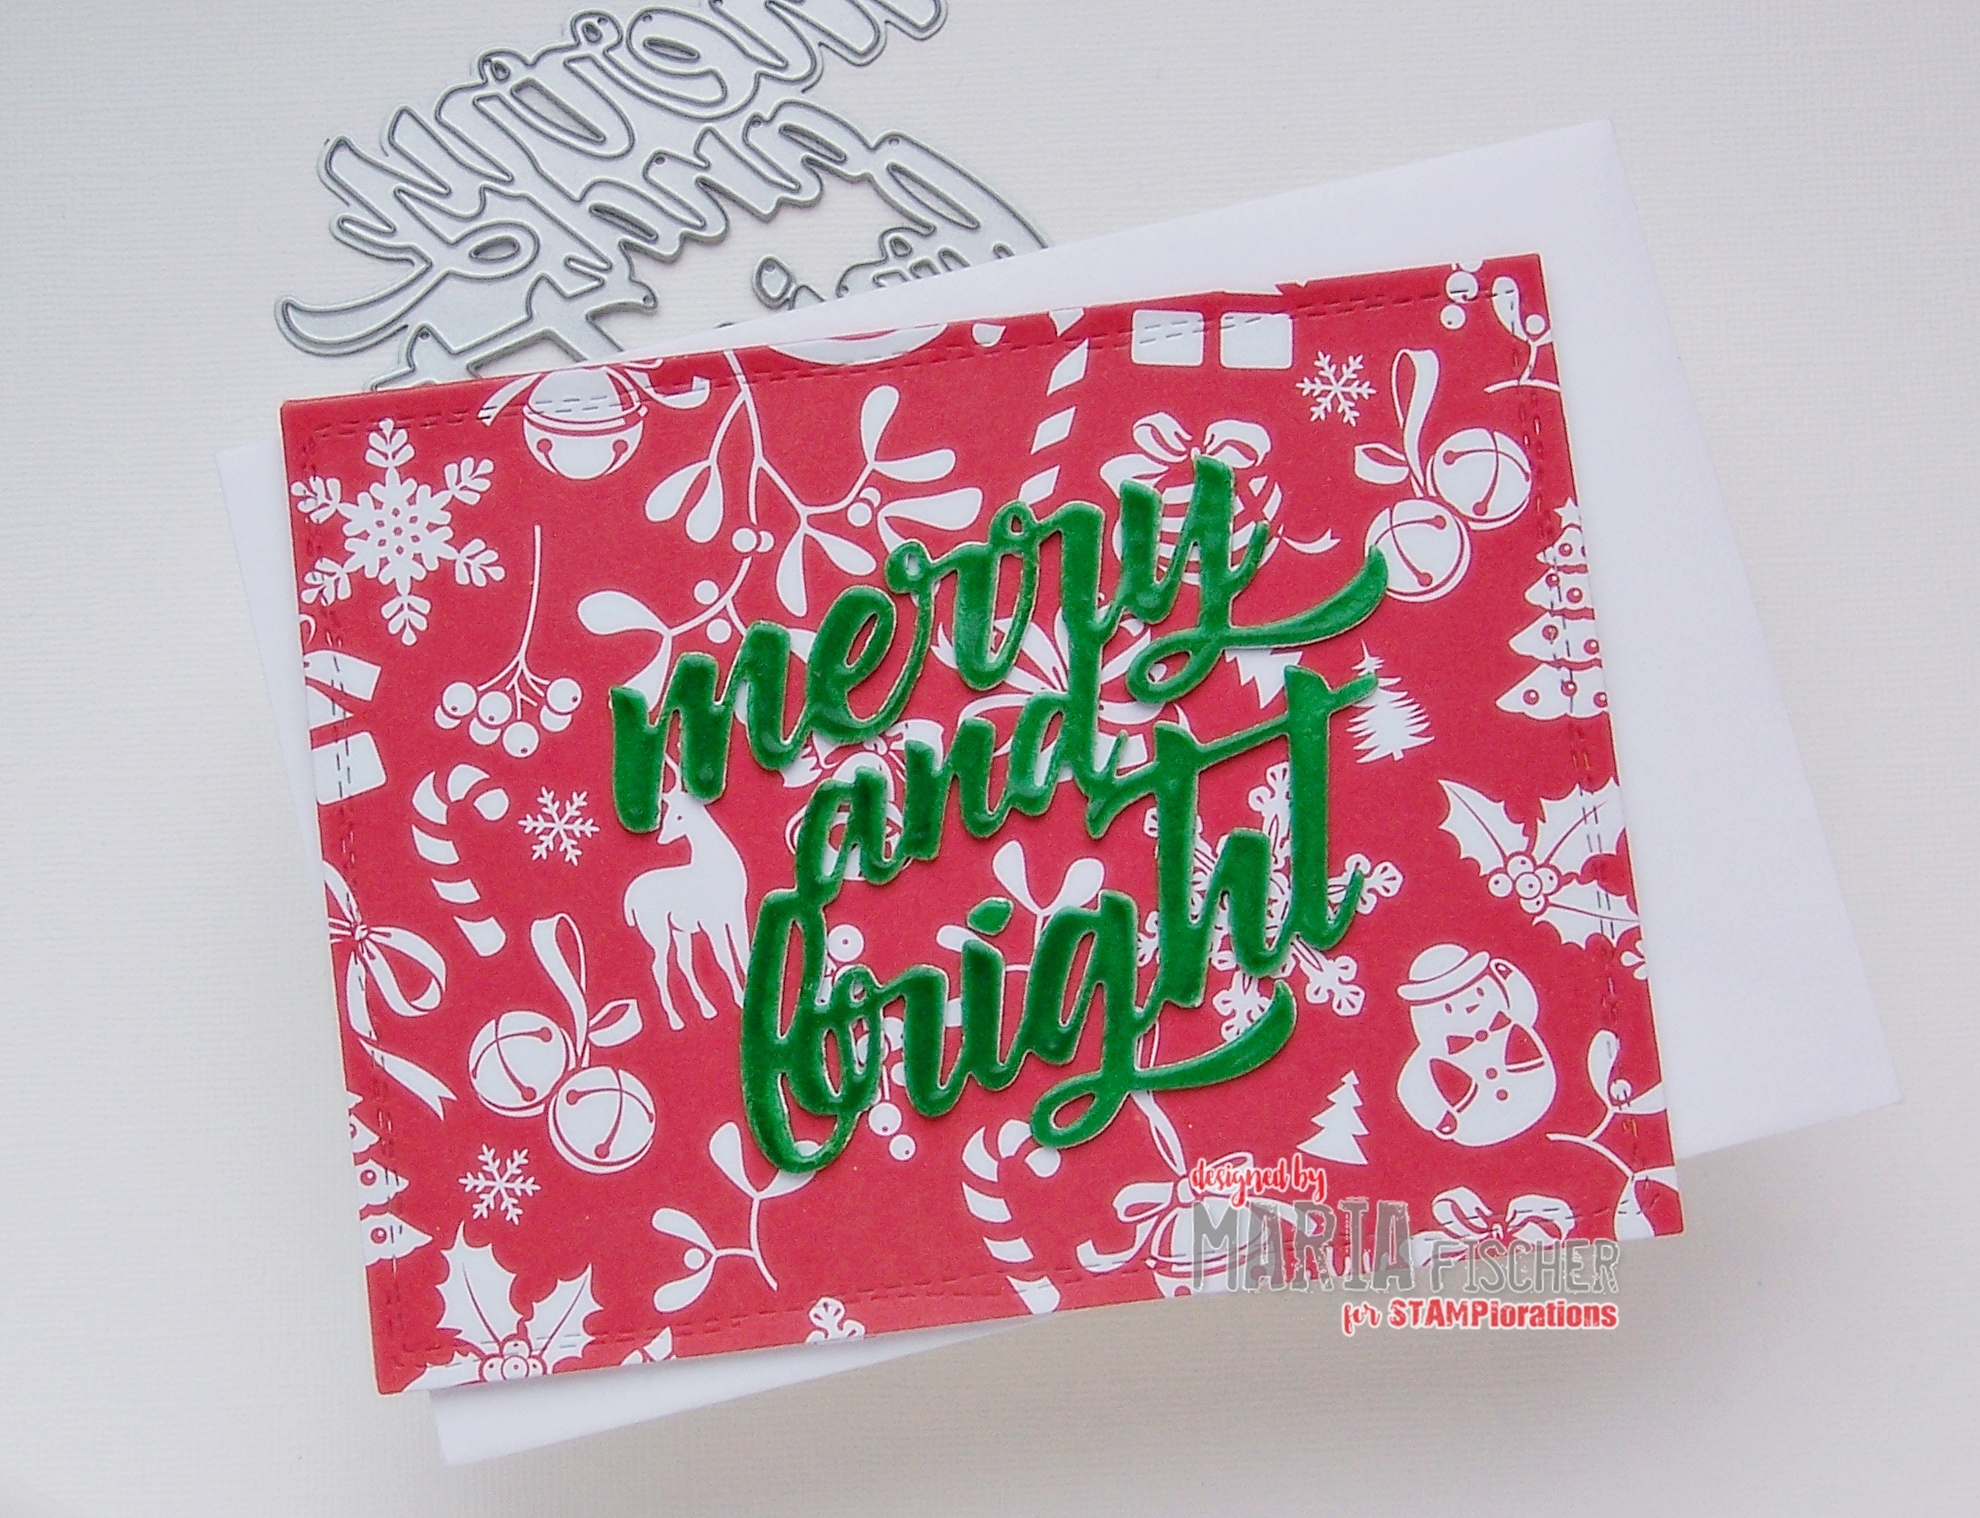

Then I took it up a notch by adding a vellum mat behind a gold repeat-embossed die cut.


For the last two, I added not only a vellum mat but also some little die cut embellishments for more color and fun.


STAMPlorations dies
Little B dies
 patterned paper, vellum, embossing powders

Appreciate you stopping by. Have a great day.

Friday, July 8, 2022

more milestone birthday cards

Summer programming coming your way the next few weeks...

First up some milestone birthday cards. 

Can you tell we have quite a few friends who are winemakers?!?


Have a great weekend! 


Wednesday, November 21, 2018

25 days of christmas tags 2018 - part 3

I'm back with more of the sets of tags I'm making as neighbor gifts this year... thanks to Tracey's 25 days of Christmas tags.

Meet my next three sets.

Indulge me and my delusions of grandeur for a moment. I am now thoroughly convinced that the MISTI and the Jingle all the Way stamp from Technique Tuesday were designed with ME and THIS  tag set in mind!!!!

Well, OK. Probably not. But this was SUCH fun to make. I was inspired by Kim's tag for Day 11 with Winnie and Walter, but used one of my all-time fave Christmas sets from Technique Tuesday who was up on Day 13. And I even used up some more PP by cutting a second layer for the "to" "from" area ;)


Reverse Confetti Gift Card Holder Tag die
Technique Tuesday Jingle all the Way stamp
Altenew inks
jingle bells, buttons, ribbon

For Day 7 with Birchpress (whose product I do not own unfortunately) I was totally inspired by Desiree's color choices for her layered ornament. I couldn't get it out of my head, but didn't know how I could recreate that look with product I own. So I couldn't really, but I came up with this.


Die cut the layers from kraft, white, silver and gold and then dry embossed all but the kraft (which has to "to" "from" area on the back). They are really cool IRL so I left a sentiment off to keep the clean look. Made these smaller tags for the set too. Great little snowflake die in that Little B set.

Little B Holiday die
We R Memory Keepers Geometric embossing folder

For Day 15 with STAMPlorations, I absolutely loved Carol's die cut tags and had to CASE them of course. Wish my photos were as gorgeous as hers!


STAMPlorations Christmas Icon Nativity die
STAMPlorations Christmas Icon Angel die
STAMPlorations Gift Builder #2 die
STAMPlorations Two Reindeer die
gold glitter CS, Delicata gold ink

I think they'll look so pretty on kraft gift wrap. Keeping them neutral lets the shape speak for itself. Thanks for the idea Carol.

I have more. Still happy Tracey's challenge spurred me to create my neighbor gifts for Christmas in November, though I'm behind the eight ball prepping for our turkey feast on Sunday! 

I'm also joining in at:
Addicted to CAS - Presents (these are all presents for neighbors, but #3 has present tags!)
Basteltraum - Winter/Christmas (#2)
Die Cut Divas - AG (#3)
Happy Little Stampers - AG with Dies November (#2)


Monday, June 18, 2018

tropical 60th birthday

... times two.

There's a couple in town who are both turning 60 and celebrating together. So of course I had to make them a "120" birthday card, right?


I absolutely love this photo and let it inspire my card. This is what the inside looks like. They are dancers ;)


The paper is from a Paper Studio pack I picked up at Hobby Lobby. Loving tropical lately. You too?

I'm playing at:
Simon Says Stamp - Work it Wednesday May
Daring Cardmakers - Anything but White
Watercooler Wednesday - All about Occasions
Happy Little Stampers - June AG with Dies

Thursday, May 3, 2018

hello baby tag

Like I mentioned yesterday, we've got new babes in the 'hood. To go with the card, I made this gift tag with more leftovers from my Easter egg dye dipping session and a touch of gold.

STAMPlorations Hello word die
gold foil cardstock
gold metallic thread

Perhaps you can see how I dip-dyed the tag. Dipped the 2/3 in pink (now the top). And then I rotated the tag and dipped 2/3 in yellow (now the right). The upper right section is a bit orange from the mix of pink and yellow. Fun, eh?

For the stork I dipped the whole thing once. Then only 3/4. Then 1/2. And finally just the legs one last time to create the ombre effect.

I'm hooking this up at:
Simon Says Stamp Wednesday challenge - Animal Magic (how 'bout that stork's magic ;)
TAGplorations - Things with Wings
Happy Little Stampers - Watercolor (hope Easter egg dye-dipping counts too)


Wednesday, May 2, 2018

hello baby

We've got new babes in the 'hood. How about you? Think it's a spring thing?!? I made this card with more leftovers from my Easter egg dye dipping session and a touch of gold-foiled PP.

PP
cotton twine

I stamped the cardbase with triangles using Delicata gold ink. Die cut a tag from the PP and adhered the dip-dyed pieces on top. Voila!

I'm hooking this up at:
Simon Says Stamp Wednesday challenge - Animal Magic (how 'bout that stork's magic ;)
heARTful stamping - AG plus stamp
Challenge Up Your Life - Watercolor (hope Easter egg dye-dipping counts too)
Happy Little Stampers - Watercolor (hope Easter egg dye-dipping counts too)


Friday, March 9, 2018

card with a tag

I saw the Tag challenge at Challenge up your Life and put together a card using one of the tags I'd dip-dyed with leftover Easter egg dye a while back.


Actually those hot air balloons are dip-dyed too. The glittery die cut sentiment was sent to me by a friend. I thought the foam sunshine "bead" made a nice addition to this up-in-the-sky design and added a fun factor to the card. I threaded it onto a snippet of cotton crochet thread.

I'm joining in at:
Simon Says Wednesday Challenge - Girl Power
Watercooler Wednesday - Feminine Anything Goes
Winnie and Walter - Join in to Win

Monday, February 26, 2018

CAS for CASe this Sketch

Quick. One post. Three cards. Thanks to a new die and a cool sketch!


Basic Grey PP
sequins

Happy Monday! I'm playing at:
CASe this Sketch - #260
AAA Cards Challenge - Die Cuts Only


Thursday, February 22, 2018

winnie and walter 4th birthday - scraps for baby card

Back with more cards for Winnie and Walter's 4th birthday bash. Yep more. And get this - they're all baby themed.


Did you see Kelly's challenge - Use Your Scraps ? Well I tackled the tower of scraps that has been threatening to tumble off my cabinet for the past few months! And this mini pile was part of the giant pile. I dip-dyed these tags and die cuts in leftover Easter egg dye last year!


Cotton crochet thread
Beads

And the last little pieces made their way to a card along with the leftover letters from this card. Some ink around the edges of the dry embossed card front tied the colors all together.

Distress Inks

Guess what? I'm done. My scraps aren't gone... but the mountain is much smaller! And I think I may have overstayed my welcome at Winnie and Walter ;) I sure love their challenges. Happy birthday, WW!

I'm joining the fun at these challenges too:
Winnie and Walter - Use Dies
Winnie and Walter - Anything but a Card

Tuesday, June 7, 2016

STAMplorations inspiration #79

Welcome to the first June inspiration post from the STAMPlorations girls. I'm sharing a card I made a bit ago, lets call it the boy cousin of this card.


A squirt of blue Kesi Pschhiitt opaque spray ink onto my cardbase. A snippet cut with Little B Block Out. A red stamped then clear embossed STAMPlorations Sketched:Birthday cake and voila! I think this would do well for a masculine birthday card. Maybe for one in July now that I notice my color choices ;)

Please take a look at what the other girls created over at the blog. If you leave a comment there, you may win a GC!

I'm playing at:
CAS Mix Up - I've also got spray ink and heat embossing happening here


Seize the Birthday

Cards in Envy - where it's to be masculine and mailable
Simply Create Too - Red, White and Blue

Wednesday, April 27, 2016

babies, die cuts and Easter egg dye

Feeling guilty about my last entry to the Little Tangles challenge

not using any Neat and Tangled product ... And seeing all these happy little baby die cut bits I had dip-dyed in my leftover Easter egg dye ... And just loving this card by Therese C. ...

I made this!


Quite simple, but so soft and lovely for a baby card, don't you think? I randomly stamped the heart from Jump Start My Heart in yellow, blue and green pigment inks cuz I think they have a softer look than dye inks. Stamped the sentiment from Just for You in gray nestled in between the hearts.


Then I strung my Little B Baby die cuts which had been colored by dipping them in leftover Easter egg dye (yep!) on cotton crochet thread and voila!

I'm sharing this card at:
Simon Says Stamp Work it Wednesday - Pastels
Cards and More - Focus on Die Cuts
Time Out - Celebration and die cuts

Sunday, February 14, 2016

love cupcakes and you

Happy Valentine's Day to all you lovelies! I hope your day is filled with chocolate and flowers and more chocolate... (I gave up chocolate for Lent. Wonder how many times I will have broken it by the time this goes live?!?!?)

Anyhoo, when I saw this inspiration photo from Cupcake Inspirations, I couldn't get my eyes off that creamy (maybe even cream cheese) frosting. Yum. Oh a gold cupcake liner doesn't hurt either.


A squirt of bold coral Kesi Pschhiitt (yeah, go ahead, say it) which is an opaque spray ink available in fabulous colors. A snippet cut with Little B Block Out. A gold embossed STAMPlorations Sketched:Cupcake with puffy frosting. And a red glitter Amuse heart with a Memory Box "u" cut out of it. Voila! Lotsa product. But lotsa scrumptious white space.

Join the fun over at Cupcake Inspirations. STAMPlorations is this week's sponsor.

I'm playing in the following challenges:
Simon Says Stamp Monday - Spritz and Spray
Simon Says Stamp Wednesday - One Layer
CASology - #184 Valentine
Stempelkueche - #37 Love is all Around
Mod Squad - From the Heart

Here's to a love-filled L♥VE day!


Friday, March 13, 2015

STAMPlorations inspiration #7

Another inspiration project for you today using The Bee's Knees: Houses from STAMPlorations. You may recall this card from awhile back.

Today's card was actually the first design that came to my mind when I decided to mask and stamp a village. And the idea for a baby card originated when I saw the words "special" and "delivery" in the Joyful Christmas stamp set! All I needed was a die cut stork. Thanks to Little B dies, that problem was solved.


Yep, Welcome to the neighborhood, baby! Thanks for looking. Feel free to CASE this card and hook up your creation at the March Inspiration CASE Playground!

The stork is also resting over at Simon Says Stamp's Wednesday challenge where it's all about Things that Fly!

Saturday, January 24, 2015

faux gelli for ric


Here comes another one of those posts about the evolution of a card. Are you ready?


I saw this outfit over at Runway Inspired Challenge and immediately got a Japanese cherry tree and manga (read: Pokemon cartoon background scenery) vibe. Had been itching to try some faux gelli plate work again. And had just received my cool new ARTplorations stencils in the mail. This is what happened.

Meet card #1.


And card #2. Heavily influenced by the bag the model is carrying!


If you'd like to see and hear about my faux gelli plate mono printing, here comes.

On my plastic bag (on top of stacked newspapers) I brayered light pink acrylic paint. Took a monoprint of it, and then a second print on a second piece of paper.


Then I sponged red acrylic paint through a Dylusions stencil onto the first print (top) and flipped the stencil over and "stamped" it onto the second print (bottom).


Then I brayered turquoise and green as sky and grass(from the inspiration photo) and took a first print (bottom) and second print (top). Sponged on darker blue through a SSS Wave stencil, flipped it and stamped it onto the other print.


Then I pulled out Stampendous Winter Trees and stamped the one print with nestled villages and trees using Archival ink.


I then sponged a few red hibiscus (that's what I'm callin' 'em) through my ARTplorations Bold Florals Stencil onto the print.


Trimmed a front panel from the above print, added a Little B die cut sentiment to the front and that was card #1.

Then I approached the second print. Stamped it randomly with Stampendous Floral Tapestry and red ink. Took my ARTplorations Leaf Prints stencil and white paint and doctored the print up a little.


And for some crazy reason, I decided to test my new Spellbinders Glass Effects die. Four times. Once from the print, and then again from shiny red and black recycled packaging and white CS. Now you know how I spent Friday evening. Arranging and rearranging and glueing little geometric pieces!

I'm sure you will see the other three Glass Effects cards make an appearance at some point, but my brain is fried for now! Tomorrow is another Fastnachtssitzung. A group of ten of us are going as Forest Witches. Got a costume to tweak. Helau!