Showing posts with label Crafters Workshop. Show all posts

Sunday, July 10, 2016

first polychromo attempt

I should be making a packing list... instead I'm playing with my new Faber Castell Polychromos. It's actually a German product. How fun.

You may have seen my first play on Instagram - swatching the colors. Well I wanted to practice some blending of colors so sought out a couple challenges and gave it a go.

Colour Q

Addicted to CAS - Stripes

and Addicted to Stamps and More - Anything Goes


I knew I wanted to use a stamped image I could practice coloring in. Thought about a little tweetie bird from Winnie and Walter but then saw this tree from Kindness and thought it fit the "stripes" theme so well. Stamped it on a scrap of white CS and started coloring. Oops. Guess Polychromos and my standard CS don't mix. It looks pretty grainy. Am I pressing too hard too maybe? Next time I better use smooth CS. Ya live, ya learn. And I need more colors to be able to do more blending. Whoddathunk 36 isn't enough?!?!?

Anyhoo, fussy cut the tree. Chose my Entrelac stencil from The Crafter's Workshop for background stripes. Used Festive Berries and Hero Arts Red Royal with a sponge dauber. Then I adhered the tree with dimensional adhesive.

The sentiment is from Winnie and Walter The Big, The Bold and Happy.

It's going to get a little quieter around here. I've got several scheduled posts coming at you. And there'll be a new STAMPlorations release late July. But we're off to visit family in MI :) Hope your summer is going smoothly. Thanks for stopping by today!


Wednesday, June 22, 2016

MMCC #24 - reminder

I've got a card for you today, inspired by the "Sunset" challenge still happening over at the MMCC. You still have time to play with us until the end of day June 25th.


Once again, I have a card using sunset colors.


Trimmed CS panel. Inked it with Wild Honey Distress Ink. Used a die cut of PTI Chevron plate as a stencil to ink with Spiced Marmelade. Applied Ripe Persimmon through Prima's Perforated Dot stencil. Spritzed with bronze Perfect Pearls mixture. Splattered with water. Applied Versafine through the Crafter's Workshop Henna Hand stencil. Die cut “u” (Lifestyle Crafts) from vellum and put the negative on my panel. Placed the Crafter's Workshop dot stencil over the negative and applied Versafine through both.. Die cut Sizzix “love” and adhered it. I just love me some graphic images!

A closeup so maybe you can catch the shimmer of the Perfect Pearls. I love that stuff.


So although I didn't actually use stamps, there's lotsa ink on my card as well as:
TEXTURE - die cut and shimmery surface
DIMENSION - die cut and the depth of the various inked layers
TECHNIQUE - die cutting and stencilling

Not sure this fits the bill due to that die cut sentiment, but I'm joining the "Stencil" fun over at One Layer Simplicity. Thanks for visiting!

Thursday, October 8, 2015

Mixed Media Card Challenge #16

It's nice to be back creating mixed media for the MMCC. Unfortunately I didn't have the supplies for it while I was at my folks' house this summer.

This month it's about black and orange with the option of glitter.


I must admit this theme immediately reminded me of one of my earliest memories of Cath E.'s Moxie Fab World in the Sept/Oct 2009 issue of Paper Crafts magazine.


So with that as inspiration, I set off to cover myself and my craft room with glitter.

I stamped the bats and stars from my favorite Halloween set Midnight Feast from WMS on a white cardbase (the sentiment is from the same set). Then used a Crafter's Workshop Aspen Trees stencil on adhesive paper to create the gradient orange BG of the focal panel. Even tried to create a moon up in the left corner by sprinkling yellow glitter through a die cut negative circle placed on top of the stencil. Burnished the oranges then removed the stencil and added the black glitter. I've done a tutorial on this technique here if you're interested.

So what's mixed media about this card? Well, I've got stamps and inks. And...

TEXTURE - heat embossed sentiment, glitter
DIMENSION - raised sentiment panel
TECHNIQUE - burnished glitter through stencils

Here's another view of the wonderful textures.


Mixed media and Halloween. Sounds like fun, doesn't it? Join us - the challenge is open until October 25th.

I'm joining the fun at Simon Says Stamp World Cardmaking Day Challenge as well as the Work it Wednesday challenge with this.
And the challenge over at Curtain Call which jumpstarted my batty BG 


Friday, May 1, 2015

Mixed Media Card Challenge #11

If you're looking for my Winnie & Walter April/May release post, click here.
If you're looking for my CASEplorations post, click here.


And another one bites the dust. Month, that is. Yes, April whooshed by and it's already time to wish you all a  "Happy May Day". Spring has sprung, the leaves have popped on the grape vines here in our valley and summer is on its way (seems that some years May is the only summer we have here in Germany ...)

We have a new challenge at The Mixed Media Card Challenge. Show us your mixed media cards with "Wings" and an optional element of "Foil" - which seems to be all the rage these days.

Must admit I had only seen the theme and not the graphic when I started thinking about my card. I was planning to create a Confirmation card and was therefore thinking angels. I ended up sticking with the angel idea, but created a baby card instead.


 Where's the blue or yellow or pink, you ask?  Had to go vintage here with those shoes!


I first stencilled some stars onto my cardbase with Tea Dye through a Crafter's Workshop stencil. Then I inked the cardbase with Antique Linen and Tea Dye and an applicator tool. Spritzed it with some Burnt Orange Glimmer Mist and added some embossing paste through a Tim Holtz stencil. When that was dry I stamped some teensy dots and rings from STAMPlorations Mixed Media Grunge randomly, also with Tea Dye. Whew.


Then to the easy part! Tore a piece of vellum. Curved and heat embossed a sentiment from PTI Tweet Talk. Heat embossed some wings from an ancient Crafty Secrets Cherub set and colored them with a Copic marker on the reverse. Heat embossed, fussy cut and lightly watercolored the baby shoes which are also ancient and from A La Carte, before adhering them to the vellum with glue dots.

Stitched the vellum to my cardbase and now I need a new baby boy in the neighborhood!

Stamps, ink, techniques, texture, dimension? Yep.

I'm joining in at PTI Make it Monday #210 where it's about using vellum to soften backgrounds. You may have noticed, it's one of my favorite materials to work with ;)

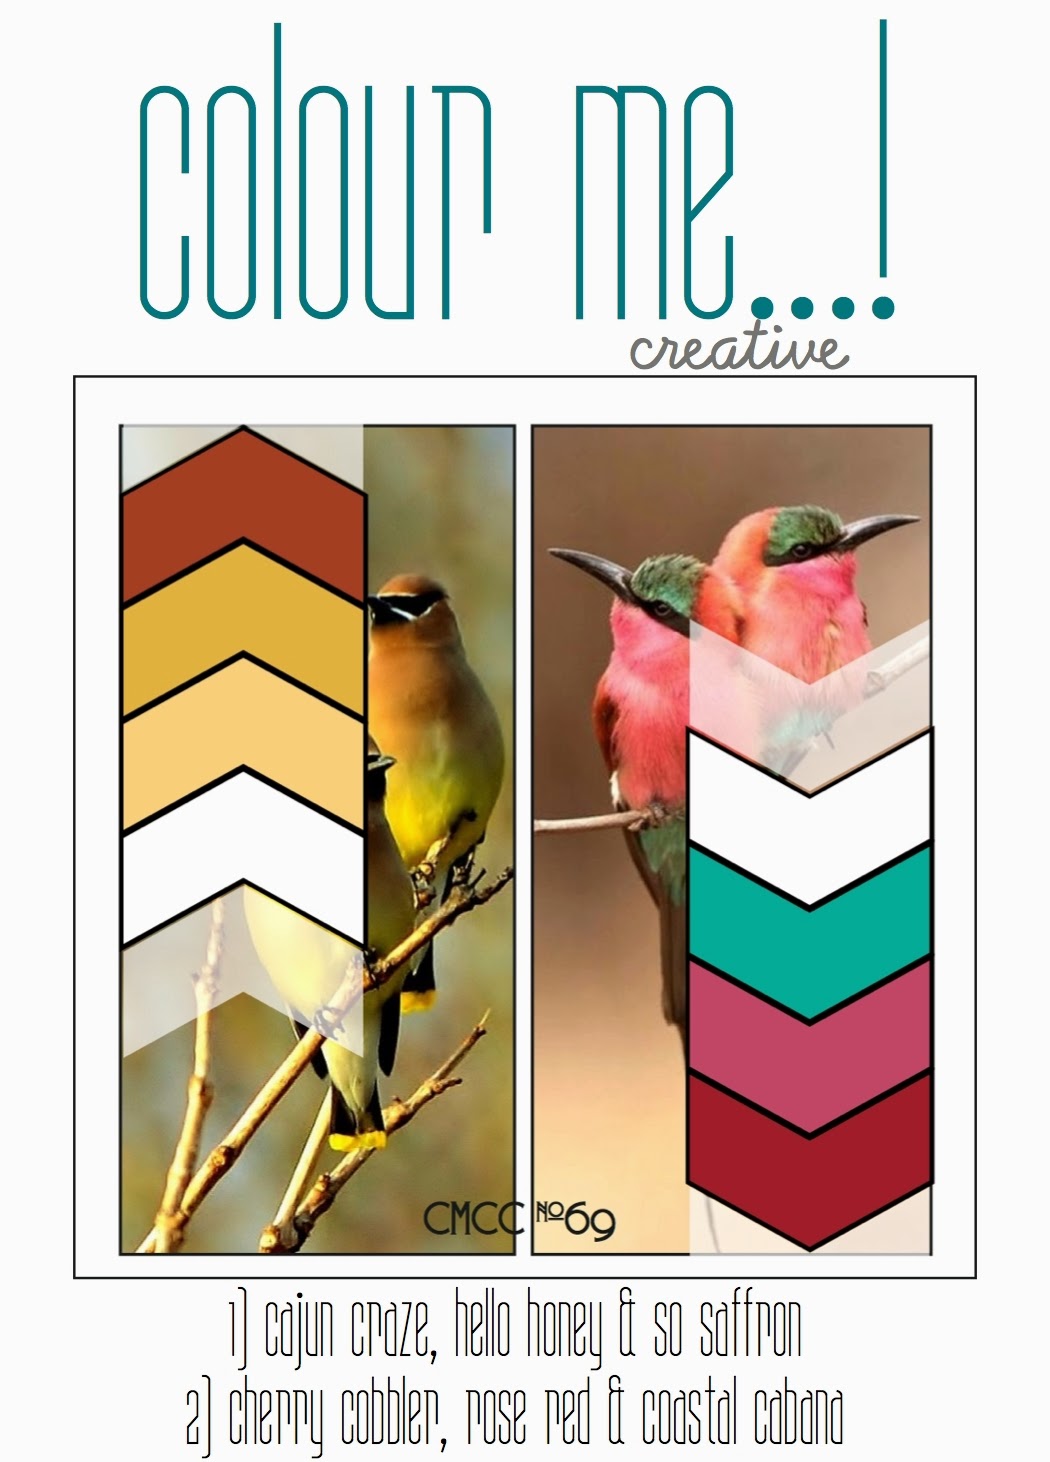
And I'm playing at Colour Me #69 where they have this lovely natural palette up for offer.


Thanks for looking today. Hope you'll join us at MMCC this month.


Sunday, March 1, 2015

Mixed Media Card Challenge #9

Spring has sprung. Not. But we're wishing for it at The Mixed Media Card Challenge #9 for March! This month's theme is "Hints of Spring" with the optional element of "Bird".

I went "butterfly". Cuz these wonderful Tim Holtz Easter Blueprint stamps were in my NBUS basket waiting to be inked up.


So what's mixed media about this card? Well, I've got stamps and inks. And...

TEXTURE - heat embossed butterfly, embossing paste through a stencil
DIMENSION - distressed and curled edges
TECHNIQUE - ink and paste through stencils

Here's another view of the wonderful dimension of the wonky layers.


Products used: 
stamps: Aha Arts (Border and Pattern, Flower Set), Tim Holtz Easter Blueprint
ink: brown Memento, yellow Adirondack, pink Aladine, Versamark
paper: polka dot Basic Grey, vellum Ursus
stencils: ARTplorations (Bubbles and Hello and Company), Crafters Workshop (Mini Spotted)

Mixed media and Spring. Sounds like fun, doesn't it? Join us -the challenge is open until March 25th.

Monday, September 1, 2014

Mixed Media Card Challenge #3

Welcome. It's time for Challenge #3 at The Mixed Media Card Challenge and the theme for September is "Fall Colors" with the option of "leaves".

I may still be barefoot on the shores of Lake Huron, but I do enjoy the thought of fall approaching. There are still plenty of wine festivals, but you don't have to worry so much about sweat dripping down your back ;)

Here's a card I made with fall colors and leaves.


You may recall the rules of the game at MMCC - use stamps and ink and texture, dimension and/or technique.

Stamps - the sentiment.
Ink - lots. On the focal panel and card base.
Texture - not much real texture here, just implied.
Dimension - the angled panel and the sentiment panel on foam adhesive.
Technique - used a die to make leaf masks. Sponged the leaves through the mask and then inked a pattern on the leaves through a stencil.

Are you in the mood for fall? If so, give a mixed media card a try and hook it up at the MMCC Challenge #3. Be sure to check out the design team work. LOTS of eye candy for you.

Thanks for your visit.


Supplies for sending warm wishes:
Paper:  CS Bringmann, PP Basic Grey
Stamps: sentiment PTI
Ink : Distress, Versamark
Tools: square die Sizzix, leaf dies Impression Obsession, stencil Crafters Workshop
Other: 


Friday, July 11, 2014

remember (MMCC)

IMHO, nature and sympathy cards go hand in hand. I have created a "cassy" mixed media sympathy card keeping the "Touch of Nature" theme at Mixed Media Card Challenge in mind.


Mixed media... it's about texture, dimension and techniques... remember?

TEXTURE- although one-layer, I've created depth by applying some watercolor, stamping the grunge BG and then stamping the flowers

DIMENSION - gold embossing paste through a stencil and a Dymo label

TECHNIQUE- took a watercolor brush to the stamped flowers to soften them up a bit

Have you entered the challenge yet? C'mon, get messy with us ;) You've got two more weeks before the challenge closes. 


Supplies for remember:
Paper:  CS Bringmann
Stamps: BG Impression Obsession, flowers Impression Obsession
Ink : Distress
Tools: stencil TCW
Other: watercolors, gold embossing paste, Dymo label maker


Tuesday, July 1, 2014

Mixed Media Card Challenge #1


Oh the fun we're gonna have! Have you heard? There's a new monthly challenge in town, The Mixed Media Card Challenge (MMCC for lazy me) and our first challenge starts today. Woohoo.

Wondering what it's all about? Basically a card with ...

TEXTURE
DIMENSION
TECHNIQUES

Check out this link. Challenge owner, Shery R., has elaborated on what we are expecting of you.

I am thrilled to be a part of the design team cuz there is some amazing talent creating some amazing cards here. You must check it out - even those of you who don't like to get inky fingers (yep, I know you're out there ;))

Each month there will be a new challenge with a theme. And an additional element which is optional. So the theme of Challenge #1 is "A Touch of Nature" (optional element: tag). Which basically means create a card,  reflect nature (however you interpret that) and include a tag in some way if you'd like. And rememer ...  texture, dimension and techniques.

Here's what I made.


And here's what I did:

1. Stamped card base with triangle BG using gray, teal and purple. Just inked up the stamp randomly.
2. Stamped white CS panel with triangle BG in black.
3. Distressed panel with gray, teal and purple.
4. Stamped panel with coffee stain stamps using water.
5. Stamped panel with small leaves using gray, teal and purple. (should have taken a photo here)
6. Stamped black leaves on panel and onto card base.
7. Mixed embossing paste with black acrylic paint and applied through doodle and dots stencils.
8. Die cut tags from panel.
9. Paper-pieced tags onto card, a few with foam adhesive.
10. Stamped sentiment onto vellum, applied purple ink to reverse and stapled onto card.
11. Scrubbed inky fingers ;)

Texture? Yep, embossing paste, staples.
Dimension? Yep, sentiment on vellum, raised tags.
Techniques? Yep, distress inking, stamping with water, paper piecing.

Messy. But I'm still claiming that it's a CAS card. Thus "cassy". Me likey.

So, how 'bout it? Give some technique you've been dying to try a go. Or pull out those old acrylic paints. Or grab or make a stencil. Channel your Dyan Reaveley and get messy. Make a card. C'mon and join us!

p.s. You're gonna love this... the challenges run from the 1st to the 25th every month. EZPZ.


Supplies organize your life:
Paper:  cardbase The Paper Studio, Neenah
Stamps: triangle BG Kaisercraft, coffee stains STAMPlorations, tiny leaves Alexandra Renke, big leaves Claudine Hellmuth, sentiment Kesi
Ink : Distress Iced Sprice, Peacock Feathers, Shaded Lilac, Memento Black, StazOn
Tools: dots stencil TCW, doodle stencil Pink Paislee, die PTI
Other: structure paste, acrylic paint


Tuesday, June 24, 2014

happy cassy news (MMCC)

I'm thrilled to be part of the new DT at the new challenge The Mixed Media Card Challenge (MMCC), hosted by Shery R., which will be starting with the first monthly challenge on July 1. Just keep watching ;)

In light of this, I'm sharing a card which was published in the July 2014 issue of Paper Crafts & Scrapbooking using structure paste. I really enjoyed this submission category and look forward to making more cards using "texture" "dimension" and "techniques" over at MMCC.


Texture? Yep. Structure paste through a dots stencil and through the "hello" negative die cut. Dimension? Yep. Wire and beads. Techniques? Yep. DIY stamps from craft foam and dies.

Thanks for looking! And watch for more "cassy" creations from me = CAS + messy fingers, BTW ;)

And while I've got your attention... there's a STAMPlorations July release/birthday blog hop coming up on June 26 with lotsa prizes ;)


Supplies golden hello:
Paper:  CS Bringmann
Stamps: 
Ink : Clearsnap
Tools: die PTI, stencil TCW
Other: structure paste, wire, beads, craft foam


Sunday, April 6, 2014

more stencils and paint (Moxie Fab)

Did you see this card I created with lots of paints and stencils? I blogged about it yesterday.


Now if you know me, you know I don't like to let anything go to waste.  I had quite a few paint-covered stencils during the creation of that card and what is a paint-covered stencil anway?  It's a giant stamp.

See the black letters, the yellow bricks and the red flowers.  Imagine all that residual value!

And meet yesterdays somewhat meeker cousin...


Just flipped the painted up stencils over onto another piece of card, put a piece of scrap paper on top of it and rubbed the residual paint onto the card.  Black, yellow, then red.

And then of course, there was the paint leftover on the palette.  Couldn't let that go to waste, so I practiced some hand-lettering of simple words.  Definitely not the stuff of stamp designers, but hey, it's real! (said in an Uncle Si tone...)


I cut out the "hi", adhered it to black CS and fussy cut it again.  Some wispy thread and two cut-from-vellum-and-stamped-with-Delicata Kesi flower custers later the cousin was dressed and ready to go!


See that wonderful touch of sparkly gold? Yum. That's the Triangles stamp from Kaisercraft, BTW. Great for a tiny, subtle print.

This cousin is joining the other one at the Stencils challenge over at Moxie Fab World. Cuz stencils are definitely moxie fabulous.

Have a good one.


Supplies for hi:
Paper:  CS Bringmann
Stamps: Kaisercraft
Ink : acrylic paints
Tools: flowers (Kesi Art)
Other: alpha stencil (Dyan Reavley), bloom stencil (TCW), bricks stencil (Dutch Doobadoo),paintbrush,  thread

Saturday, April 5, 2014

stencils and paint (Moxie Fab, SSS, Virginias View)

Playing with stencils and paint I was. After doing the mountains of laundry that accumulated here while I was having a good ole time in Michigan!

Wanna have a looksee?

Used my DIY gelli plate (a plastic bag on a pile of newspapers) applied green paint to gelli plate and "printed" onto white cardstock.


When it was dry I applied turquoise and light blue paint through a raindrops stencil from The Crafters Workshop. Um, you may notice I actually used the "second print" of the green page, not the page pictured above.


Then I used black paint with an alpha stencil from Dyan Reavley.


I die cut a bloom and hand cut a stem to use as masks.  Adhered the masks temporarily and applied cream paint to the entire piece. This is how it looked when the masks came off.


Went with yellow paint and bricks (from Dutch Doobadoo) on left side; red paint and blooms (The Crafters Workshop) on right side of piece. Get the picture?


Took masks off. Stamped leaf with black paint. Trimmed panel to size and adhered to card. Made a dymo label sentiment and popped it up on dimensional adhesive and over some wispy threads. Figured after all the "heavy" stuff a little bit of "wispy" was in order ;) So here she is in all her glory...


And let me tell you right now, I was totally inspired by Jessica Sporn. Wanna have some fun and get wild? Check out her blog. And stop by tomorrow to meet this card's somewhat quieter cousin ;)

This is going to the gallery at Moxie Fab World where it's all about Stencils right now.  Check out the amazing gallery and add something of your own.  And I'm also joining the Birthday fun at Simon Says Stamp - 5 years. Not bad, eh? Have a great weekend! And ETA:  Virginia's View Challenge #2 is Stencils too.  Gotta go there!


Supplies for happy birthday:
Paper:  CS Bringmann
Stamps: Claudine Hellmuth
Ink : acrylic paints
Tools: bloom (Spellbinders)
Other: stencils, label maker, brayer, paint brush, thread


Tuesday, March 18, 2014

hatee-hatee-hatee-ho (CFC, Simply Create Too)


Forgive me in advance for giving you an earworm....  but c'mon, how genius was it of those guys to pick up on this idea and make a song out of it. In case you aren't familiar with THE fox (insert doubtful look), here ya go.


In case it's been too "lo-o-o-o-ong"... go have a watch.  And come back singing, OK? Cuz of course you want to know the answer to the question...


So...  THIS fox says "i'ma-i'ma-i'ma-re-ject". Made for a recent submission call honoring Mr. your-fur-is-red-so-beautiful.  Not having made the cut for the mag, it's purr-fect for the current Shades of Gray challenge over at CASual Fridays.  It's even donning three shades of gray with the CS, heat embossing and washi. Since they're now keeping their doors open for three weeks, I may manage to join the fun more often.  Yippie-yippie-yippie-oh.


With all the rage in hand lettering these days, I mimicked it by freehand-forming a piece of wired ribbon (like stiffening twine with glue - without the gl-ue-ue-ue-ue!) The ribbon was originally yellow, just painted it black when I was done.  TIP: Use temporary adhesive to help you while forming.  The wire tends to have a mind of its own.

So have I got you feeling frisky? The current challenge at Simply Create Too is "Animals".  How will you speak to that "cha-al-al-al-lenge"?

You will forgive me, won't you?


Supplies for party on foxy:
Paper:  gray cardbase Bringmann 
Stamps: Studio Calico, sentiment CASual Fridays
Ink : Versamark
Tools: stencil Crafters Workshop
Other: clear embossing powder, acrylic paint, embossing paste, wire ribbon, gems


Monday, March 10, 2014

be happy tag card (SSS, ABNH)

Hi. Had this tag staring at me - I'd tried some stencilling techniques on it - and decided to turn it into a card.


Boy, what didn't I do on this card?  Originally it was used to stamp off a BG stamp I had stamped with acrylic paint and then splattered and edged with watered down gold paint.  Then I decided to stencil on it. First I colored just the blooms through the stencil with watercolor pencils, then blended with a water brush. Then added some more accent color to the middles of the blooms. Then I sponged Distress Inks on the remainder of the stencil. Then I made some splatters with Glimmer Mist (which didn't turn out well probably due to the paint underneath?!?!). Then I colored some seam binding and vellum with Distress Ink and die cut the sentiment, also die cutting it from white CS and stacking before adhering. Scored a second tag at the top and glued to this one and tied the bow through both.  It's a card.

This won't be going into an envie, but maybe onto a present packed in cellophane...

It's also going into the following challenges:
Simon Says Stamp - Tag It
A Blog Named Hero - #39 Stencils

Happy Monday, friends.  Come by tomorrow to see if you were a winner in the WCMD  Winners or Card Creations blog hops!


Supplies for be happy:
Paper:  tag
Stamps: 
Ink : Distress Ink, Glimmer mist, watered down acrylic paint
Tools: stencil Crafters Workshop, die Simon Says Stamp
Other: seam binding


Friday, February 14, 2014

simply create too 55 (st. patrick or green )


Happy Love Day.  But forget the red and pink. It's time for a new challenge over at Simply Create Too.  This time Challenge #55 is about St. Patrick's Day/Use Green.  I've not a lot of use for St. Patty's cards so I went green. And yes, I like Kermit.


My background is a piece of tracing paper that I used to sop up excess spray ink when I was having some fun with stencils.  I have a large piece of backing from contact paper that I keep on the bottom of the cardboard box I use when spraying.  It catches the excess but because it's plastic-y it doesn't absorb and I can sop the ink up with scrap paper.  This time I misted the ink with water first to dilute it, then soaked it up.  Amazing results - although you never know for sure what you will get with this technique.


After adhering it to a blue cardbase, I applied clear modelling paste through the Crafters Workshop Rain stencil and added a tiny bit of gold glitter to it before it dried.  Subtle, but effective.  Computer generated a sentiment to fit the mood of the card.

I'm joining the talented ladies at CASology this week where the cue is BOLD.  Yep.

Feeling green?  Simply create too!


Supplies for brighter days:
Paper:  cardbase Bringmann, tracing paper
Stamps: PC-generated sentiment
Ink : Dylusions spray inks in turquoise and green
Tools: stencil Crafters Workshop
Other: modelling paste, gold glitter

Sunday, February 9, 2014

pattern-tastic (CMBC)


Not too long ago I was complaining that challenges were disappearing from blogland and now it seems a plethora of new ones are popping up.  I can't keep up!

If you didn't know Taheerah A. before, you certainly got to know her during the farewell blog hop for Cath of Moxie Fab. That mammoth operation would not have gotten off the ground without Taheerah's efforts. Well, have you seen Taheerah's latest endeavor - Cure for the Monday Blues Challenge? Some of the most gorgeous inspiration photos like this latest one:


Not to mention the killer cards that girl creates for her own challenges and the other design teams she has taken by storm. I'm finally playing along (this is already CMB #3) with a card I made for a submission call.  Species "reject" but I think it fits the bill here perfectly.  And I spent way too many minutes deciding on the arrangement of my focal image which is somehow Taheerah-esque.

Here 'tis:


Used the Simon Says Stamp Diagonal Stripe Stencil, but only in one quarter of the card front, and a sponge dauber to ink the stripes in Chipped Sapphire, Salty Ocean and Broken China. Rotated 90 degrees and repeated. Then I slopped on some modelling paste through a Crafters Workshop chevron stencil. Then I added that funky ikat PP circle (why? no clue but once I'd tried it I couldn't not do it!) before adhering the shadowed gold glimmer Papertrey Hello die cut.

Enough patterns for ya?!?!?  Are your eyes wonky now?!?!?

Thanks for a great new challenge, Taheerah. And the rest of you should play along in the next one. Here's hoping you don't get the Monday blues to begin with ;)))


Cardstock: (cardbase) Buttinette,  (navy) American Crafts, (bronze metallic) DCWV 
Patterned paper: (ikat from Print Shop) Studio Calico 6x6
Dye ink: (chipped Sapphire, Salty Ocean, Broken China Distress Inks)
Dies, embossing folders, brass templates: (Diagonal Stripe stencil) Simon Says Stamp, (Chevron stencil) Crafters Workshop, (hello die) PTI
Tool: (spatula), (circle punch) EKS

Other: (white structure paste)  

Friday, November 1, 2013

more neon and black (SSS, KIS)

Remember my pink leaves? In case you were wondering what happened to all the others which I die cut, they became a mini garland in our entryway.


What does this have to do with neon and black?  Not much eh?  Well, remember the neon circles I used for my festive wreath? There were more where those came from so I decided to make a garland.  And trim a tree with it.  However, it didn't work.  TIP:  Garlands work best strung across the full face of a card, not necessarily on narrow areas.  So...


The idea was still a good one.  Get the bokeh feel here?  But a garland without the stitching part! Used the Hero Arts Tiny Ink Spots BG stamped in black, a hand cut triangle for the tree and some washi for the trunk.  The chevrons were made with a Crafter's Workshop Mini Chevron stencil and acrylic paint.  The sentiment from Hero Arts Holiday Sayings was repeatedly embossed.

TIP:  I've mentioned this before but if you have a nice juicy pigment ink, you can heat emboss with clear powder for great results.  You save money (don't have to buy colored powders). And you avoid those stray flecks of embossing powder. (Not that it would really have mattered on this card with the BG and acrylic paint seepage ;)

This will also go to the Caring Hearts Card Drive and I'm joining the fun at:
Simon Says Stamp Monday Challenge - Anything Goes
Simon Says Stamp Wednesday Challenge - Anything Goes
KIS - #  26 Use Sticky Notes (my circles were Post-Its in their prior life)

Funky, but me likey.

Happy weekend.  Almost.  (It's a holiday here in Germany today. Lucky us.)


Supplies hohoho:
Paper: CS Bringmann, Post Its
Stamps: BG and sentiment Hero Arts
Ink:  Versamark , Versafine
Tools: circle punch, stencil Crafters Workshop
Other:  clear embossing powder, acrylic paint, washi