Showing posts with label Ursus. Show all posts

Monday, October 14, 2013

ready, set, splatter (Craft Stamper, SSS)


Splatters.  I used to wonder how people made the cool ones.  My fave are still the ones some scrapbookers pull off with black spray paint spilled out of the paint can cap.  But I'm not doin' that in the house.

So, there are the sprayed kind.  The dripped from the tube of the spray bottle kind.  The dripped from a wet paint brush kind.  Or the kind that happen when you bang the wet paint brush against your other hand - but they usually end up somewhere you didn't want 'em.  The ones you make with a stamp that nearly all the stamp companies have come out with in the past six months - but that's cheating, right?  Or you just squish your Distress Inked BG into the remaining ink droplets on your craft sheet (that you misted with some water).  That's how I got these red blotches.  Callin' 'em splatters.


There is a challenge over at Craft Stamper mag for cards using splatters - a featured technique in this month's issue.  Check it out.

My stamping was done with Crafty Secrets Cherubs set so I'm hooking up at Simon Says Stamp's challenge to use clear or rubber stamps.  Some heat embossing and fussy cutting.  Some woodgrain paper.  Enamel dots (LOVE those things). Voila.

Appreciate your visit.


Supplies love:
Paper: PP Ursus, Simple Stories
Stamps: Crafty Secrets
Ink:  Distress Ink, pigment ink 
Tools: scissors
Other: clear embossing powder, enamel dots MME

Saturday, October 12, 2013

fall birthday (Clearly Besotted, SSS)

Take a negative die cut piece of PP that falls onto another piece of PP laying on your messy workspace causing you to think "oh, that looks cool."  Move it to the side to work on later cuz you're in the middle of submission call stress, making sure not to lose that tiny little piece that separates the bird from the branch.  Move it around three more times in the chaos.  Notice that the colors of the new challenge at Clearly Besotted Stamps are like the colors in those PPs and decide to make a card.

That's how I roll, folks.


Used the sentiments from Happy Everything (I love the combo of fonts in this set).  And a NBUS die from Impression Obsession "Leaves" with some Coredinations whitewashed cardstock.  The die even impresses veins into the leaf which you can't really appreciate from my photo.  Now I understand where the company name had its birth ;)

It might have been small, but I used clear stamps for the sentiment so I'm joining the fun at Simon Says Stamp this week too.

Thanks for visiting.


Supplies happy birthday:
Paper: cardbase Bringmann, PP Ursus
Stamps: sentiment Clearly Besotted
Ink:  Cat's eye, Distress 
Tools: bird die Sizzix, leaf die IO
Other:  

Friday, March 29, 2013

i'm a water girl (AEIU, SSS)


Give me a body of water and I'm a happy camper.  That's why the inspiration photo at Avery Elle inspires me - rainy weather and all.  Add a weatherbeaten whitewashed dock... I wanna be there.


Still don't own AE stamps (did you see they now have some matching dies - created by the queen of die cutting herself, JJ Bolton) but I've used a free digi stamp again for this challenge.


So much fun making the BG with Distress Inks and water splotches.  Cut the frame out of woodgrain PP and whitewashed it with some white and aqua acrylic paint and a dry brush.  Printed the sentiment in gray onto vellum and added some ink to it.  TIP:  Brads are another option when it comes to adhering vellum!

Also playing at Simon Says Stamp Anything Goes challenge.

Have a nice day.


Supplies Best Wishes:
Paper: CS & PP Bringmann, vellum Ursus
Stamps: digi Avery Elle
Ink : Distress Inks
Tools: die Spellbinders
Other: brads, acrylic paint, water


Tuesday, February 26, 2013

behind the clouds (SCS, CASE)

Creating again with Teri A.'s card over at CASE Study # 129 in mind.  I love me a rainbow and I happen to own the rainbow die from MFT so I used it for the SCS Love Fest 2013G Challenge sponsored by MFT.  It's called Make My Day and the challenge is to create a card of encouragement.


I love the sentiment on Teri's card and it reminded me of a banner I made back in high school.  We're talking  3' by 6' to hang on the cafeteria wall!  Used blue burlap, cut white clouds out of felt and wrote the sentiment - the one I've computer-generated on my card - with glued-on orange yarn.  The sun was actually "Son" on my banner.  I've always been inspired by rainbows and by that saying.

My neighbor/Zumba instructor is having thyroid surgery today and the doctors are not sure what they will find.  Figured this card covers all bases...   Hoping for the best of course.

Thanks for visiting, folks.


Supplies for Behind the clouds:
Paper: CS Bringmann, white The Paper Company, vellum Ursus
Stamps:  PTI
Ink : Cat's Eye
Tools:rainbow die MFT, cloud die PTI
Other: computer generated sentiment, glue dots

Saturday, February 9, 2013

hearts, hearts and more hearts (SSS, CFC, CTD)


Howdy folks.  Stumbled upon this photo over at CardMaker which I love for two reasons.  Hearts are probably my second favorite graphic shape, after circles.  And I love bokeh.


Had to make a bokeh heart card.


Started with  the Tim Holtz Bird on a Branch die.  Minused the bird and half the branch.  Decided where I wanted the branch and then generation stamped the bokeh-y hearts to mimic the string of heart lights in my inspiration photo.

Didn't want to take away from the image with a sentiment so I used a new-to-me-but-age-old die to cut "thanks" from vellum.  Stitched it on with some pink thread and voila!

Cuz heart challenges are the rage at present, I'm playing at:
Simon Says Stamp - Have a Heart
CASual Fridays - #89 Love Song (cuz Love is in the Air everywhere I look around ;)
Color Throwdown - #228

Hope you're having a good weekend - not buried under snow.  We continue to get snow showers here.  Just enough to make the ground white.  Love it.


Supplies for thanks:
Paper: cardbase Buttinette, CS American Crafts, vellum gray CS Ursus
Stamps: Paper Smooches
Ink : Distress Ink
Tools: branch die Sizzix, sentiment die Provo Craft, sewing machine
Other: thread


Monday, October 1, 2012

soup and nuts and stencils and die cuts (Three Cool Chicks, Moxie Fab, SSS)

Are we having FUN yet?

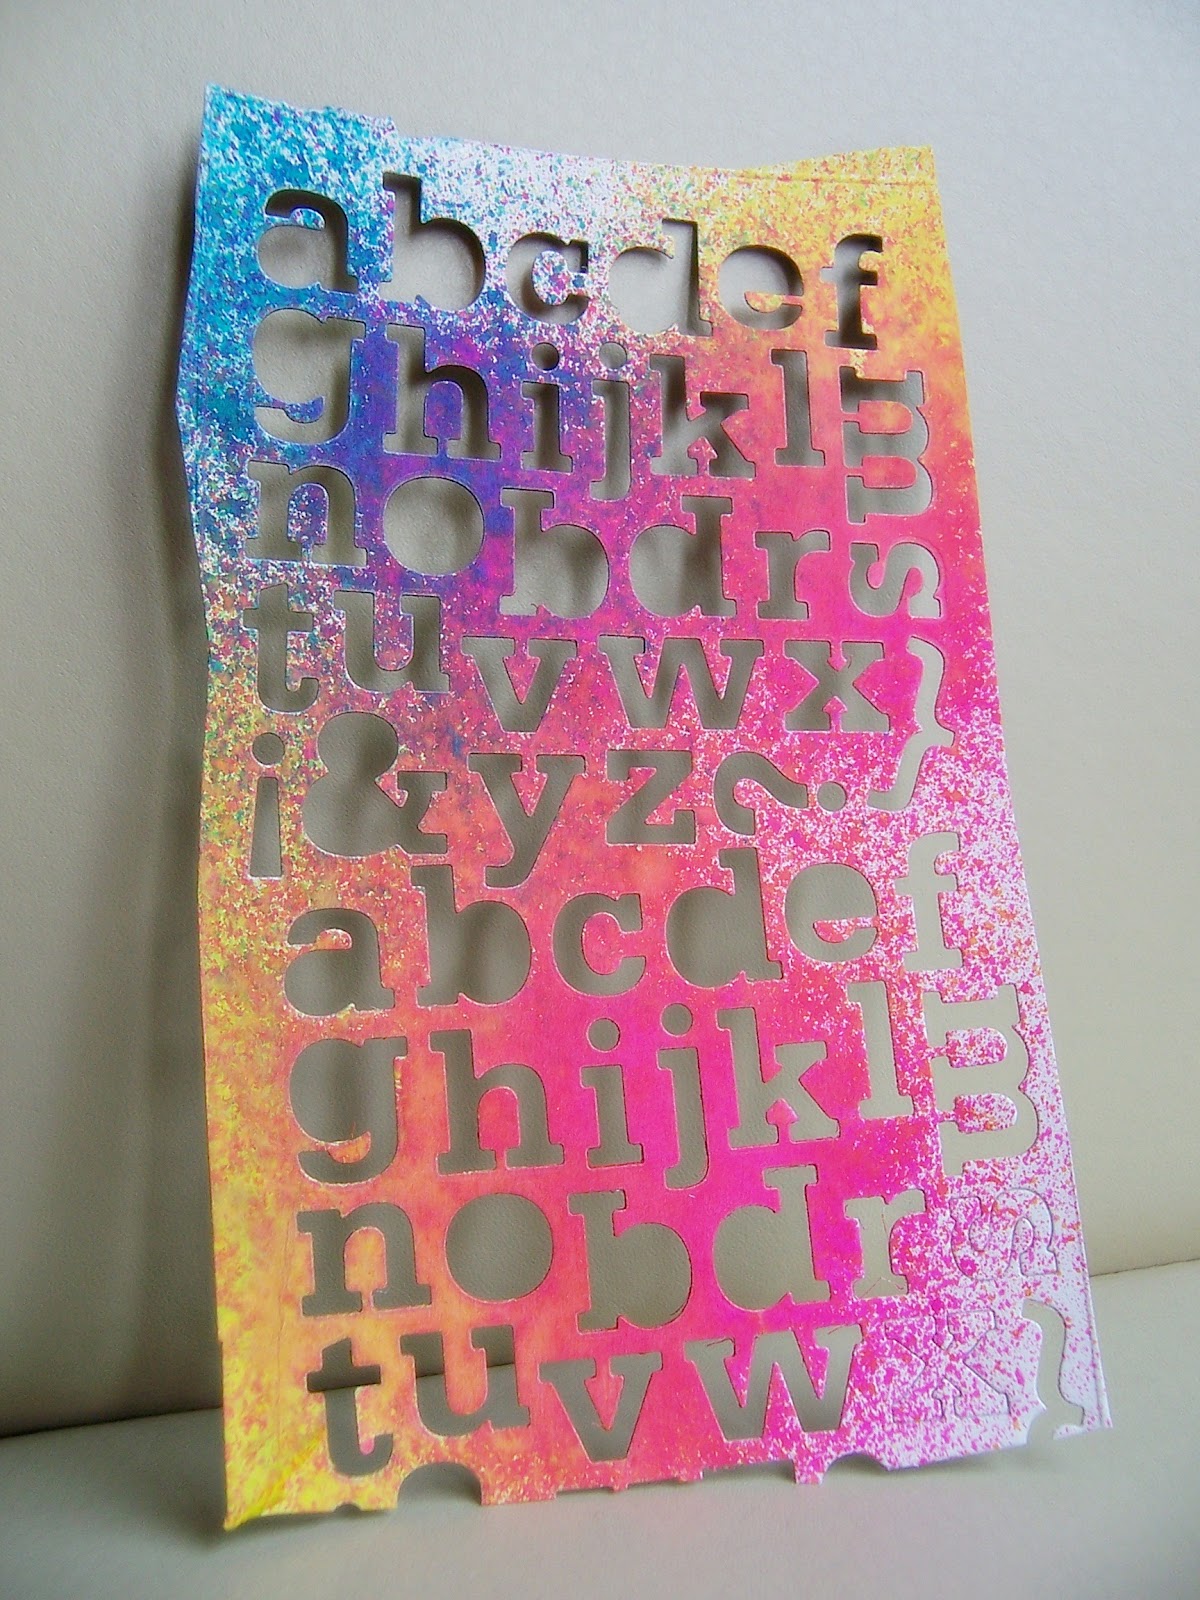
My latest fun... I'm playing with Three Cool Chicks and their trendy ideas.  Days 3 and 4 were about stencils and die cuts.  Ta da.  I am (since summer) the proud owner of an alphabet die.  And before I busted a couple individual letters out of the pack, I die cut the whole caboodle a couple times from chipboard.  Cuz ya never know, right?

Enter my luscious Dylusions ink sprays.  I sprayed over the negative and onto white CS.  Ta da.


My plan had been to use the white CS to make a card.  But my wannabe-artist-heart beat faster when I saw this abundance of gorgeous color plus typography.  I was almost more enthralled with the color-intense negative than the positive. What to do?  Then after taking these photos, as I laid the negative on the positive on my way back to my ironing board (read: crafting space), I had a lightbulb moment.  Intrigued?  Stay tuned for more - I got three cards outta these bad boys.

Here is #3, which was actually the third one I made but you get to meet him first ;)


Let me just say this was what I had leftover after #1 and #2.  Now the "hi" in the midst of other letters is no new thing.   Just new for me.  Thought about die cutting some shape out of this piece but I couldn't bring myself to cut off any of that scrumptious color except for a teensy bit around the edges.  So I cut my card base down to be a bit more square and attached.

I had cut the "h" and "i" out of some gold CS (like I said, stay tuned!) and decided I liked the shape of the negative.  Looks kinda like a house, doesn't it?  Stuck it on and stitched for some interest.  The bottom edge needed something.  Not sure I like my solution, but oh well, now it has "something"!  Popped a little scrap of gold behind a few of the holes too.  See?


So, once again thanks to Yvonne, Amy and Julie for all the fun I'M having ;) Check them out if you haven't yet.


So that's my Soup and Nuts for the Tuesday Trigger photo over at Moxie Fab.


And how about one more shot at Simon Says Stamp's Anything Goes challenge?


Supplies hi:
Paper: card base Buttinette, recycled chipboard, gold CS Ursus
Stamps: none - wow!
Ink:Dylusions ink spray
Tools: die PTI, border punch Fiskars
Other: sewing machine


Tuesday, July 31, 2012

Gotta love Moxie Fab!

Still catching up on what's been happening in blogland.  And lo and behold, Cath has a trigger photo which I saw somewhere in my life, which totally inspired this card awhile ago.


Now I can finally give credit where credit is due.  Check out these amazing cakes - lots of inspiration there.  This card is actually leaving my house next weekend when the couple is having their civil ceremony before they marry in the church on New Year's Eve in New Zealand.  How romantic, eh?

edit:  When I saw the latest challenge at Casual Fridays, Banners and Flags, I had to hook this lovely up.


Supplies :
Paper: CS American Crafts, PP Usurus 
Stamps: Artemio 
Ink: Cats Eye
Tools: embossing folder (Craft Concepts), sewing machine, decorative edge scissors
Other:  satin ribbon, doublesided tape/glue, scrap silver paper, digital cake stand (123RF)


Tuesday, July 3, 2012

interactive kid's card

I decided to give interactive another go at.  This time for my 5-year-old niece's bday card.  Thought she might get a kick out of it and apparently she did.  (Or was it the money attached to the pull out card?!?!?)


What did I do here?  Wanted to use lots of girly, sparkly PP cuz my niece loves it.  Made a base.  Cie cut another layer.  Made a pocket out of old book page.  Stamped on the base and the pull out card and added her name to the banner.  Added some glimmery stickers, twine and a button.  Felt like an engineer putting this one together!

Hope you're having a glittery day.


Supplies hi:
Paper: Ursus, old book
Stamps: Paper Smooces, alpha Hero Arts
Ink: Versafine
Tools: border punch Martha Stewart, dies Spellbiners
Other: stickers, twine, button Sew Sweet


Monday, June 25, 2012

have another wine... label

Made an anniversary card for my neighbor's parents who are celebrating 50 years. Always so happy when that happens. 50 years, I mean. My folks are already at 62. WOW! Anyhoo,


All I knew was I wanted to use a wine label.  Found this card, loved the quartrefoil and woodgrain and went from there.  I stamped "Happy 50" inside with the 50 gold embossed.

Young Crafters Unite challenges you to use layers.  I've got eight.
1. cardbase
2. PP
3. mat
4. wine label
5. embossing
6. shimmery gold strip
7. medallion
8. heart

And because I originally thought about using a folklorica die cut on the lower half, I had some leftover pieces so I put two more cards together.


Used another gold embossed wine label here, with a strip of merlot underneath it and a strip of shimmery gold for the sentiment.  Fun thing about the die cuts (I used to think "Who needs dies?  I can cut everything out by hand."  Ha.) if you cut the same image from different colors, you can mix and match.  Thus the touches of red in the black image came from the image I die cut from red.  This card uses the red negative.  So efficient, eh?


Thanks for visiting!  Chances are I'm sipping on a glass of riesling as you read this...


Supplies 50th:
Paper:cardbase Buttinette, PP Ursus, CS Coredinations
Stamps: Clear and Simple Stamps
Ink: Versamark
Tools: die Sizzix, heart punch Make Me, butterfly punch Martha Stewart
Other: embossing powder
 
Supplies Happy Anniversary:
Paper:cardbase Buttinette, PP Ursus, CS Coredinations
Stamps: Clear and Simple Stamps, sentiment Hero Arts
Ink: Versamark, Versafine
Tools: die Marianne Creatables, corner rounder EKS
Other:
 

Supplies  happy birthday!:
Paper:cardbase Buttinette, PP Ursus, CS DCWV
Stamps: TPC Studio
Ink:  Versafine
Tools: die Marianne Creatables, circle punch EKS
Other: bling, twine

Saturday, June 2, 2012

a rose is a rose is a jubilee (CPS)


Quick one here.  Made another rose card and this one is going to the CPS card sketch #267 and Less is More who are featuring red, white and blue in Her Majesty's honor.

CPS badge for your blog/site


We'd love you to display our banner


The rose - heat embossed on vellum, again.  The die cut label stamped with Faded Jeans Distress ink.  The red spheres were a test run of my new rainbow die.  Found a stamp that fit inside the circles and one to add some weight to the bottm and called it a card.

Enjoy your weekend, especially those of you in Her Majesty's backyard.

Supplies Life's Moments:
Paper: cardbase Buttinette,  Neenah, vellum Ursus
Stamps:  The Craft's Meow, WMS, Kelly Panacci, CreaMotion
Ink: Versamark, Versafine, Distress Ink
Tools: die Spellbinders, MFT
Other: embossing powder


Thursday, April 26, 2012

glückwunsch (DIY embellies)


Another episode of DIY embellishments - this time from the Tim Holtz Tattered Flowers die.  Had confirmation cards to make for DD's girlfriends.  I chose the flower theme.  DD chose the color for this one - beige.

OK, that's cool.  Been hoping to play with CR84FN and here's my chance.


BTW - I know I saw a macaroon stamp out in blogland but I can't find it again.  I think it was actually French.  Anyone have a tip?  Anyway, no macaroons for confirmation.  Just purty blooms. 


Die cut the flower layers.  Used a stylus to make a "bowl" in center of each layer.  Used a scoring tool to curl some petal edges under.  Inked edges.  Assembled flower and added brad to center.  Stamped large flourish on card base and added a die cut border strip to ground the embellies.  Attached large flower with foam tape.

Punched a coordinating center for small flower and added girlfriend's initial to it.  Added some shimmery watercolors to the butterfly left over from an old project, inked edges and attached.  Spritzed with some Perfect Pearls.   Stamped the "glückwunsch" (congratulations) sentiment and frame from this set on the inside.

Thanks for stopping by.

Supplies glückwunsch:
Paper: cardbase Buttinette, PP K&Co, Ursus, old dictionary
Stamps: flourish Rubbernecker, butterfly Martha Stewart, sentiment Inkystamp
Ink: Distress Ink Ranger
Tools: flower die Sizzix, border die Spellbinders
Other: paper flowers Prima,  brad, letter sticker

Wednesday, March 21, 2012

18th Birthday Celebration (distress inking)


18 is the age in Germany when you are allowed to drink hard alcohol and get your driver's license. (Beer and wine are allowed at age 16 - can you believe it?)  I needed an 18th bday card.

This is one of the challenge photos over at The Craft's Meow (they're celebrating their first birthday).  A kid's dream, eh?


Two elements jumped out at me.  The banner and the striped wallpaper.  Then I noticed the white labels on the candy jars. 


Inked up the striped Hero Arts BG with Broken China and dabbed a bit of it off before stamping.  Applied ink around the edges with the applicator tool.  Printed the free digi image from TCM and placed it near the bottom like the candy jar table.  Cut some flags, placed them with a bit of adhesive then stitched them into a banner on the card.  A couple little stickers from KI Memories to include the "18" and it's a wrap.

Funny.  The recipient is getting a cocktail glass full of gummy bears along with this card.  Just realized how appropriate that is considering the challenge photo!

Appreciate your coming by.


Supplies Happy Birthday from the Heart:
Paper: CS Neenah and American Crafts, PP Ursus
Stamps: digital The Craft's Meow
Ink: Distress Ink
Tools: corner rounder EKS, sewing machine
Other: stickers KI Memories