Showing posts with label My Minds Eye. Show all posts

Friday, December 4, 2015

how old?

Quick post today with a card inspired by the Pinterest Inspired Challenge. Don't know exactly why, but this image totally caught my attention. The colors are not "mine" although they work fabulously together in the image. I am not a fashionista, so it can't be that. Maybe there's something about her pose... Maybe it's the doodling on the skirt...


This older stamp came to mind. Gooseneck from Stampotique. Cool, isn't she?


And thanks to Klartext Kartengruß I've got a cheeky sentiment to match. "How old?" she asks disbelievingly ;)


I had such fun coloring her stockings and shoes with Copics. Gave her crystal blue eyes too. She needed something to stand on, so a strip of washi from MME Nob Hill joined my card.

I'm going over to Seize the Birthday with this card. No toppings included.


And squeaking in at AAA Cards.


Thanks for looking. Enjoy the weekend. DH and I are in Hamburg this weekend. It's all about baking Christmas cookies for me when we get home... But there's another card for you tomorrow. Same inspiration!


Monday, April 20, 2015

day 1 STAMPlorations spotlight - Fond Expressions


Welcome to day 1 of Spotlight Week - five new sets, one to be spotlighted each day this week. Ready?

Here is today's spotlighted set - Fond Expressions.


"May love always surround you". Hmm, sounds like a job for ARTplorations Hearts all Over stencil!


Masked off the center of my Neenah CS panel and pounced some red, orange and pink Distress Inks through the stencil. Removed the mask and stamped my sentiment in the white oval. And thought it needed something more. So I stamped the sentiment onto a die cut oval and adhered it. And you can't go wrong with a few enamel dots, right?

I'm joining the Make your own Background over at Simon Says Stamp Wednesday.

So, hop on and see what the other girls have created. Be sure to comment by April 27th, there are prizes up for grabs as always! Enjoy!

Darnell - Guest Designer
Maria (you are here)

Wednesday, April 1, 2015

CASEplorations April

If you're looking for my mixed media projects today, they're here and here.


Have you been fooled yet today?  It's CASEplorations time over at STAMPlorations today and that's no joke. We've got a bold and beautiful orange beauty up for the CASEing this month and you're going to love what the STAMPlorations gals have done with it. Check out the post here.

We're CASEing Kimberly Wiener of wienerhoneymooners. If you haven't visited her blog you definitely should. Kimberly is on multiple design teams and is constantly creating and sharing colorful, gorgeous, expressive cards for them. Check out this beauty we've chosen to CASE.

source: Kimberly Wiener

I've used one of the oldies but goodies from the Subway Art series, Mom Subway Art Builders #2 for a Mother's Day card. Or just to let Mom know she's a great lady.


Orange? Check. Blue? Check. Light and airy die cuts? Check. I used a spray of roses in the BG instead of a rabble of butterflies! But doesn't the blue ribbon kinda resemble a butterfly? And the circles on it mimic the water spots on Kim's Distress inked BG.

I added a strip of washi along the bottom of the tag to fill the empty space and chose gold/black striped from MME Nob Hill in a nod to the striped and gold ribbons Kim used as banners.

Remember, if you feel like CASEing this card, or any of the DT Inspiration Projects coming up during April, you can hook up your creations here.

I'm playing along at Cards and More (just ordered a Gelli plate from them!) where the theme of #129 is "Tag". And I'm hooking up at A Sprinkle of Imagination's Anything Goes challenge (you can get the washi tape there).


Monday, March 23, 2015

STAMPlorations inspiration #8

It's inspiration time over at STAMPlorations today. I've pulled out one of the oldies but goodies from the Subway Art series, Mom Subway Art Builders #5 for a Mother's Day card. Or just to let Mom know she's a great lady. I, for one, am still working on the "unconditional love" thing.
Dang, it ain't easy!


I used a spray of posies from Basic Grey in the BG, but the beautiful rose bud from Blossom Overture would look great peeking out from behind the tags too!

I revisited a technique and design you might remember from teamie Vicki's birthday card! Stamped the posies in SSS Stone on the creme cardbase and the sentiment on the tag die cut with a MFT tag STAX die.

I applied yellow, orange and blue gelatos to a second die cut tag, swiped them with a baby wipe and then dry embossed the tag with a Cuttlebug polka dot folder. Adhered it peeking out a bit behind the sentiment tag. Added a strip of envelope liner along the bottom of the card. A few MME enamel dots as flower centers finished it off.

Remember, if you feel like CASEing this card, or any of the DT cards from March's Inspiration Project posts, hook your card up in the gallery here and you're in the running for a $15 GC or two stencils of your choice. The winner is chosen randomly.

Tuesday, February 10, 2015

thanks mother, thanks city crafter

I'm so happy to be joining the lovely ladies at City Crafter Challenge as guest designer this week. What a lovely theme Kirsty has chosen - "Tell someone they matter". Yep. Do it today. Don't wait for tomorrow.


This one's going out to my mom. She's always been there for me. Probably my #1 fan. I'm happy that I'll be seeing her in just a few days when I take a vacation from my family (tee hee hee) to spend some one-on-one time with my folks. And Michigan temperatures.


For my card I pulled out PP from My Mind's Eye and Glitz. Yippie. Only 999.999 more sheets to use up! The heart frame is from the SSS Heart in a Box die. The sentiment is heat embossed from STAMPlorations Bold Sentiments: Hello and paired with a Dymo label. I trapped a wood veneer heart lacquered with red nail polish behind the vellum in the frame and two chevrons covered with gold glitter Smooch up in the left corner. And added some lovely yellow sequins.

Thanks so much for having me, City Crafter.

Sunday, October 12, 2014

i saw a butterfly (RIC, Dazzling Divas, ATSAM)


What do you see when you look at the latest fashion photo from Runway Inspired Challenge?


Well forgive me for this one, but at first glance I thought skinny model here was wearing giant wings (maybe it's something about the position of her arms. Or just my eyes.) Ping. Butterfly. Then I got the whimsical, light and airy overall feel of the photo thanks to that sheer backdrop. Ping. Vellum. Then the black "outlines" on the outfit and finally the XXL black clunker on her finger.

Which all turned into this card. Which is yellow and black, cuz my mind's eye assumed this was yellow. (Must really be my eyes!) 


Stamped the sentiment and then the stems of the STAMPlorations tulips in black on card. Heat embossed tulips yellow on vellum and backed the vellum strip with PP. Stitched and adhered to card. Die cut butterfly from Add a Little Dazzle metal sheet in black and adhered it with glue dots. A strip of PP along the bottom was the finishing touch.

I'm joining:
Addicted to Stamps and More - #116 Anything Goes

Just as a reminder, the October challenge over at STAMPlorations is open 'til the end of the month.


Appreciate your visit. Enjoy the weekend.


Supplies:
Paper:  Bringmann, vellum, PP MME and Pink Petticoat
Stamps: STAMPlorations, 
Ink : Versamark, Versafine
Tools: die Hero Arts
Other: embossing powder, sewing machine


Wednesday, October 1, 2014

Mixed Media Card Challenge #4

(If you're looking for my Exploration STAMPlorations post it's here.)


Happy October! Leaves changing colors and trick-or-treaters. At least in some necks of the woods! It's time for a new Mixed Media Card Challenge and this time it's about "vintage". My mind went to some Halloween stamps from Waltzingmouse and Inkadinkado that have a great vintage-y feel to them and this is what I did.


If you need a refresher, here's the deal on what makes a card a mixed media card. But basically, it's about TEXTURE, DIMENSION and TECHNIQUES.

Texture? I've got distressed edges and heat embossed witch and sentiment.
Dimension? How about a raised die cut and gems?
Techniques? Inked over the embossing which resists ink and splattered with water.

There is an optional element every month, and this month it's a key. But I opted not to use one. (I'm still maintaining that I can create a mixed media card and keep it kinda CAS ;) Check out the DT's fabulous creations and show us what you've got. The challenge runs until October 25th.


Supplies:
Paper:  Bringmann, Coredinations, Neenah, MME
Stamps: BG Hero Arts, witch WMS, sentiment and stars Inkadinado
Ink : Distress Inks, black Memento
Tools: die Spellbinders
Other: black embossing powder, gems

Wednesday, May 21, 2014

exploration STAMPlorations grunge floral strips and a giveaway! (CTS)


Welcome to my third day of showcasing three of STAMPlorations latest stamp sets.  Today I am working with this kinda unique VIGNETTE: Grunge Floral Strips:


BTW, those green arrows mark the two stamps I used on my card.  But first off, the challenges I chose to inspire my card - CAS(E) this Sketch #76 and Colour Q #241.


I'm not really a hexagon gal.  When I looked at that sketch I saw a rabble of butterflies!  So I stamped the longer stamp (in brown) and the shorter stamp (in pool) onto scrap CS, and die cut and punched some butterflies.


So I basically used the stamps to create my own PP in the colors I needed.  The small motif lends itself to this, especially for smaller die cuts.What else could you do with these stamps?  How about making fake washi to match your project's colors?  Or creating a frame for a die cut word? Or how about this idea of Nonni's?

Oh. When I was looking for some graph paper-ish PP I stumbled upon this one from My Mind's Eye and decided that those blooms would be sweet down in the corner (thereby disqualifying myself from the Colour Q challenge!). But I still thought a gold flutterby would be fun! And then I added the sentiment from SUBWAY ART: Dare, inking it ombre with pool and turquoise before stamping. And I added a bit of Wink of Stella  to the large butterfly as you can see in the closeup.

Soooo. Did I mention a giveaway? I hope you saw my cards from day 1 and day 2? I'm giving away one of the three stamp sets I used on my cards (courtesy of Shery R. owner of STAMPlorations) and here's the deal...

Leave me a comment (by Friday midnight EST) telling me which set - Dare, Thank You or Grunge Floral - you like best and why. Or how you would use it. I'll pick a lucky winner on Saturday!

Have a great rest of the week and thanks for visiting.


Supplies for dare to dream
Paper:  CS Bringmann, PP MME
Stamps:  STAMPlorations
Ink : blues Inkadinkado, brown Memento
Tools: large butterfly die Memory Box, small butterfly Clearly Besotted, butterfly punch Martha Stewart
Other: Wink of Stella


Saturday, March 1, 2014

WCMD "with appreciation" blog hop


Welcome to springy Germany!  Hope you are joining us today for the"With Appreciation"blog hop. We, who were the lucky winners of an amazing prize package in the World Card Making Day contest back in October 2013,  have put this hop together to show our appreciation for all the goodies we received from generous manufacturers. If you want to learn  more about the contest (check out the prizes) and start thinking about your card ideas for the 2014 contest, check out this post at Paper Crafts and Scrapbooking.

So many companies provided so much great product.  We winners decided to make another card in the same category we won, using some products from the prize package. You should have arrived here from Lorraine M.'s blog. Be sure to hop along, not only are there great card ideas in all five WCMD card categories, there are some giveaways too!

So, first my card and then my giveaway.


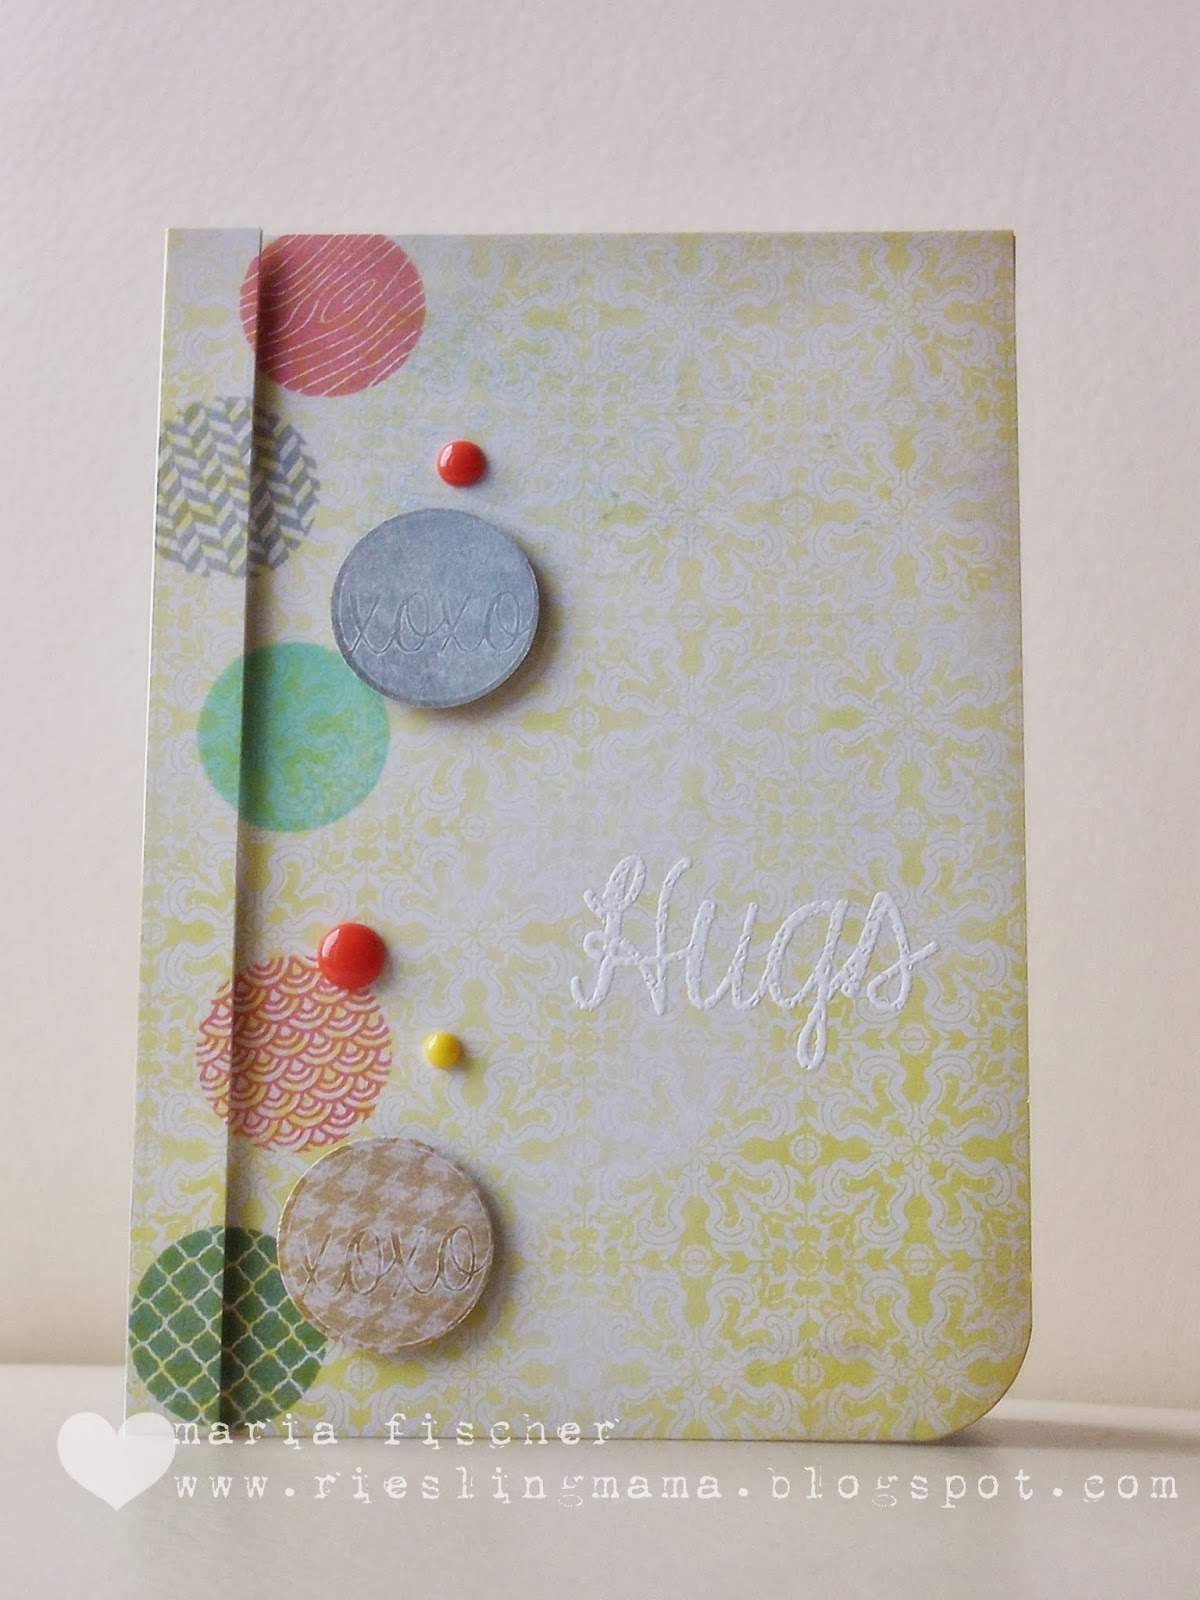
You may recognize my design - it's the same I used on my winning birthday card - the raised strip on the left. This time I used the Lil Inker "Spot On" stamp set for the circles and sentiment.  I used Hero Arts inks in Fresh Peach, Soft Granite, Mint Julep and Field Greens. I stamped onto PP from the Glitz "Sunshine in my Soul" 6x6 pad. These fabby products were all part of the prize package.


I heat embossed the sentiment and also put a piece of PP on the inside and continued my sentiment... "on your birthday".  It's difficult to see but I stamped the XOXO circle with white pigment ink on two punched circles and added them with foam adhesive for added interest.  A few enamel dots finished the party.


So, would you like to win a couple goodies?  I have the Spellbinders Captivating Squares dies and a Hero Arts Mint Julep ink pad to give away.  And cuz I just had my second bloggiversary I'm adding a Summertime with Fibi and Lilly stamp set from The Craft's Meow too.  I will pick a random winner on March 10.  Here's what ya have to do. I love trying to pinpoint trends, for example I think the owl is gonna replace the fox; and the diamond the hexagon.  Your turn. Tell me what you think the next hot trend in cardmaking is gonna be...

Now, hop on.  If you started at Paper Crafts and Scrapbooking, great, if not you might want to check it out too.  I heard there might be a prize!!! Now, over to Miss Meet-me-on-the-Corner-Of Miriam P. ya go.  Enjoy.  And thanks for hopping by.


Supplies for hugs:
Paper:  white CS Bringmann, PP Glitz
Stamps: Lil Inker
Ink : Hero ARts, Versamark
Tools: circle punch
Other: enamel dots, white embossing powder

Monday, October 21, 2013

new trend? (Moxie Fab, ATCAS)

Sharing one of the species "reject" with ya here cuz I want to hook it up to the Stickers Challenge at Moxie Fab World.  2014 is going to bring a lot of milestone birthdays in my neck of the woods- the kind with a "5" in front - and I had this idea for a card for a girlfriend who starts things off.


Had a ping (as Bev would say) to use a hashtag.  Wanted to use the Pink Paislee Luxe glitter stickers. The sentiment was cake.  Got it down on a strip of vellum but then had to decide which PP to put it on.  I kid you not, I must have laid that strip down on 50 sheets of PP, taking a photo each time cuz my brain was getting too foggy to objectively decide on one.  The following morning I decided on this PP.  Thought the doodle-y, whimsical-ness was a quirky match for the sparkly, "50" mature nature of the card.  My friend is so not "50"... whatever that means...

So, this didn't make the cut in the last PC submission.  But I am seeing the hashtag all over the place lately.  For one brief moment I'm gonna think of myself as a trendsetter ;)

I'm also hooking up at Addicted to CAS #24 where the theme is Transparent.  As in vellum in my case.

Thanks for visiting.


Supplies #hello50:
Paper: cardbase Bringmann, PP K&Co., vellum
Stamps:
Ink:  
Tools: 
Other stickers Pink Paislee, enamel dots MME


Monday, October 14, 2013

ready, set, splatter (Craft Stamper, SSS)


Splatters.  I used to wonder how people made the cool ones.  My fave are still the ones some scrapbookers pull off with black spray paint spilled out of the paint can cap.  But I'm not doin' that in the house.

So, there are the sprayed kind.  The dripped from the tube of the spray bottle kind.  The dripped from a wet paint brush kind.  Or the kind that happen when you bang the wet paint brush against your other hand - but they usually end up somewhere you didn't want 'em.  The ones you make with a stamp that nearly all the stamp companies have come out with in the past six months - but that's cheating, right?  Or you just squish your Distress Inked BG into the remaining ink droplets on your craft sheet (that you misted with some water).  That's how I got these red blotches.  Callin' 'em splatters.


There is a challenge over at Craft Stamper mag for cards using splatters - a featured technique in this month's issue.  Check it out.

My stamping was done with Crafty Secrets Cherubs set so I'm hooking up at Simon Says Stamp's challenge to use clear or rubber stamps.  Some heat embossing and fussy cutting.  Some woodgrain paper.  Enamel dots (LOVE those things). Voila.

Appreciate your visit.


Supplies love:
Paper: PP Ursus, Simple Stories
Stamps: Crafty Secrets
Ink:  Distress Ink, pigment ink 
Tools: scissors
Other: clear embossing powder, enamel dots MME

Wednesday, September 11, 2013

write it on the board (SSS, Paper Crafts, Neat and Tangled)

Between rabbit h-e-double-toothpicks and puppy heaven it's been awhile since I've seen my craft room. Actually just came here to check out the deadline for that ombre beauty over at Moxie Fab (actually had an idea circling in my head) and again I've way missed the deadline.  Where did the last two weeks go?!?!?  But I've something to share that's  pretty hot right now.  Chalkboard, anyone?

The idea for this was born in the annual pumpkin carving parties we've had.  Started them before Halloween hit Germany in order for my kids to get a taste of it.  Well, loads of pics are taken and I thought a photo CD could be a nice gift for friends.  So how about a photo CD holder?

I know there are tutorials out there for CD holders, and string closures, and  pocket books.  Well this kinda combines 'em all.


I cut the top edge off of a CD envelope and stamped with polka dots.  Used envelope as a guide to cut “wrap” from black CS and scored. 


Punched holes in wrap where closures would go.  Punched two circles each of CS and PP for closure, glued together to strengthen and punched hole in middle.  Inked edges.   Cut 12” piece of crochet thread and laid it in a circle on tape around the hole in flap.  Inserted eyelets (catching crochet thread secured at top hole) and set. Tied knot in other end of crochet thread.


Lay wrap flat and stamped subway art design with white ink.  Stamped design again with Versamark and heat embossed white.  TIP:  When doing subway art,  lay all stamps out (various companies/thicknesses) to get design, then carefully place large acrylic block over them and pick up all stamps of same thickness on block and stamp at one time.  Stamped design first with white ink and then slightly offset when heat embossing to achieve smudgy effect. When cooled, smeared white ink using finger. 

Added doodles with white pencil.  Stamped and heat embossed “To/from” on reverse.  Die cut label and stamped/embossed sentiment; adhered with washi. For CD envelope:  I cut a strip of PP 2 1/2 x 5” and scored in the middle.  Sandwiched bottom edge of CD envelope in folded PP strip,  adhering front of envelope to back of PP and back of PP to inside of wrap.

Yeah, it's a wrap!  (pun intended).  Here's the chalkboard effect for a closer look. 


I'm goin' places with this one.

Simon Says Stamp - Emboss it
Paper Crafts September Gallery Challenge - Chalkboard
Neat and Tangled -  #20 Back to the Blackboard

Thanks for looking.


Supplies for photo CD holder:
Paper: black paper Bringmann, PP American Crafts, MME
Stamps: (dots BG) Kars, (Vintage Camera) Maya Road, (Haunted) Cosmo Cricket, (Midnight Feast ) WMS, (Scary Night) Inkadinkado
Ink :  Versamark, Adirondack pigment, white pencil
Tools: die Spellbinders
Other:  embossing powder, crochet thread, eyelets, washi

Friday, June 21, 2013

go organic (PDCC, AEIU)


When I saw the inspiration at Play Date Cafe with its organic shapes I immediately thought of the craft foam stamp I'd made for this card.  Yeah, it got used again!

And the sponsor at PDC is none other than Avery Elle.  Great stamps.  Big wish list.  So I headed over to see what their challenge is this month and lo and behold...
Um Nina, think you could have fit a few more elements on that sketch maybe?!?!?!?  Now I know tags on cards are all the rage but I had to incorporate my vines.  So this is what I did with that sketch.


Have a great weekend and thanks for stopping by today.


Supplies way to go:
Paper: Bringmann,
Stamps: Avery Elle
Ink: Versafine, Aladine, Clearsnap
Tools: vine die PTI, circle die Sizzix
Other: craft foam, enamel dots MME, foam adhesive

Thursday, March 28, 2013

pretty pastel hi (Moxie, CREATE, CAS Sunday, SSS)

FINALLY getting a chance to play along with a relatively new challenge, CAS on Sunday, where a couple of my bloggie friends are part of the DT.  This week's theme is Flutterby.  How could I resist?

The current Tuesday Trigger at Moxie Fab World is so perfect for Easter and so spring inspiring. Only hope it might work to warm the temps up here...


Here's my CAS  pastel flutterby, fluttering by to say "Hi".


I'm also hooking up at the March challenge at Create:  and Simon Says Stamp Anything Goes. Happy Easter friends.


Supplies Hi:
Paper: CS American Crafts, PP K& Co, MME, vellum Ursus
Stamps: PTI
Ink : Jenny Bowlin
Tools: butterfly die Clearly Besotted, wonky border die MFT, heart punch, corner rounder EKS
Other: beads, Glossy Accents

Monday, March 25, 2013

altering PP and sequins (PTI, PP, ATCAS, SSS)

Love, love, love sequins - they're like bling's mailable cousin.  So of course I had to hop along with the Papertrey blog hop this month.
A few weeks ago, Jen R. created a card using confetti like an abacus and I told her that made me think of sequins on a line.  I put 'em on a stick pin here and finally got around to the line now!


Actually still playing with PP after the Online Class Pattern Play.  Paper piecing (stamping on PP) is really another way of altering PP like we learned on Day 4.

And I'm playing at Addicted to CAS where the theme is Spring as well as Simon Says Stamp where the theme is Easter/Spring.  Don't the lovebirds just seem to come out of the woodwork in the spring.  And these colors are definitely springy.

Happy hopping.


Supplies you're engaged:
Paper: CS Bringmann, PP MME
Stamps: PTI
Ink :Hero Arts, Versafine
Tools:  square dies Sizzix, scissors
Other: sequins, thread, glue dots, Cutter Bee


Pattern Play Day 5

Busy  weekend so I'm squeaking one in here Monday morning for Pattern Play Day 5.  Very much inspired by Kristina W.'s soft and lovely baby card...


Learned a new "quilting" technique (and I must admit it took me five times watching the video to actually get mine right - I am so not capable of thinking 3D).  But another great way to incorporate PP into a card.

And I want to share the art DD made for me for my bday.  Made my heart so happy!  She was inspired by my inspiration back in this post about my blog crush and the card I created based on it.  Isn't that cool?


Have a wonderful week and thanks for stopping by.  I sure appreciate it.


Supplies for BABY:
Paper:CS Bringmann, PP MME, vellum The Paper Company
Stamps:Crate Paper
Ink : Versamark 
Tools: embossing folder Cuttlebug, ruler scissors
Other: cotton crochet thread, button Sew Sweet