Showing posts with label Three Cool Chicks. Show all posts

Wednesday, October 3, 2012

toot my washi horn (Three Cool Chicks, I am Doe, CFC)

Consider this a triple crown challenge.

Take this inspiration photo from I am Doe.


Add the challenge #72 at CASual Fridays to toot your own horn by being inspired by your own blog header.  See above.

And I've had washi on the brain since Day 1 of the Three Cool Chicks Trendy week.


This is what I've come up with:


Some heat embossed leaves turned trees.  And one colorful tree made from washi (store bought and homemade) which I trimmed into teensy strips, adhered to a stamped image as a guide and then fussy cut.  Gave it a washi trunk too.

The photo inspiration is pretty obvious but I really like the simplicity of this card just like the simplicity of my blog header.  And gray.  I love gray as a design element.  And the trees in rows.  Reminds me of the rows and rows of grapevines that surround me.

Thanks for looking.


Supplies thanks:
Paper: card base Buttinette, CS papermania
Stamps: leaves Basic Grey,  sentiment Jane's Doodles
Ink: Versamark, Memento
Tools: 
Other: embossing powder, washi Bella Blvd & Rayher (also homemade from tissue paper)

Tuesday, October 2, 2012

more soup and nuts and stencils and die cuts (Moxie Fab, Three Cool Chicks, SSS)

You stayed tuned - good for you.  Here are cards #1 and #2 from my fun session with alpha dies and Dylusions spray inks.  Got your sunglasses on?  Here they come.


This was my first idea.  I told you I loved the color saturation on the negative so that' what I went with first.  Thought it worked best with black.  But then I punched some holes in the black to let the white card base peek through.  Love that effect.  And, a la JJ the die cutting queen, I popped some gold CS letters into the negative to emphasize the "hi".  Here's a shot of the gold for ya.


Also told you that I had a "wow" moment when I was holding both the white CS and the negative that I had used as a mask in my hand.  This is what I saw.  That cool shadow effect.


So I die cut the wonky rectangle, emphasized the "hi" by drawing white stitches around it to match the chipboard "U" I had picked out to go with the message.  Then after DD said "what's this "U" card for?" we decided I needed to make those stitches black.  Still see a bit of the white peeking out from under the black, eh?  I ran my little Cutter Bee thingy around the edges for a bit interest.  Have to look closely to see it.

And again, I'm playing with these fun groups - Three Cool Chicks, Moxie Fab World and Simon Says Stamp.   Check out my last post if you want to see more about what I did to make these.


Go get inky.


Supplies #1:
Paper: card base Buttinette, recycled chipboard, recycled gold CS 
Stamps: 
Ink: Dylusions ink spray
Tools: die, PTI, hole punch
Other: 

Supplies #2:
Paper: card base Buttinette,CS Neenah, recycled chipboard, recycled gold CS 
Stamps: 
Ink: Dylusions ink spray
Tools: die, PTI, Spellbinders
Other: chipboard stash

Monday, October 1, 2012

soup and nuts and stencils and die cuts (Three Cool Chicks, Moxie Fab, SSS)

Are we having FUN yet?

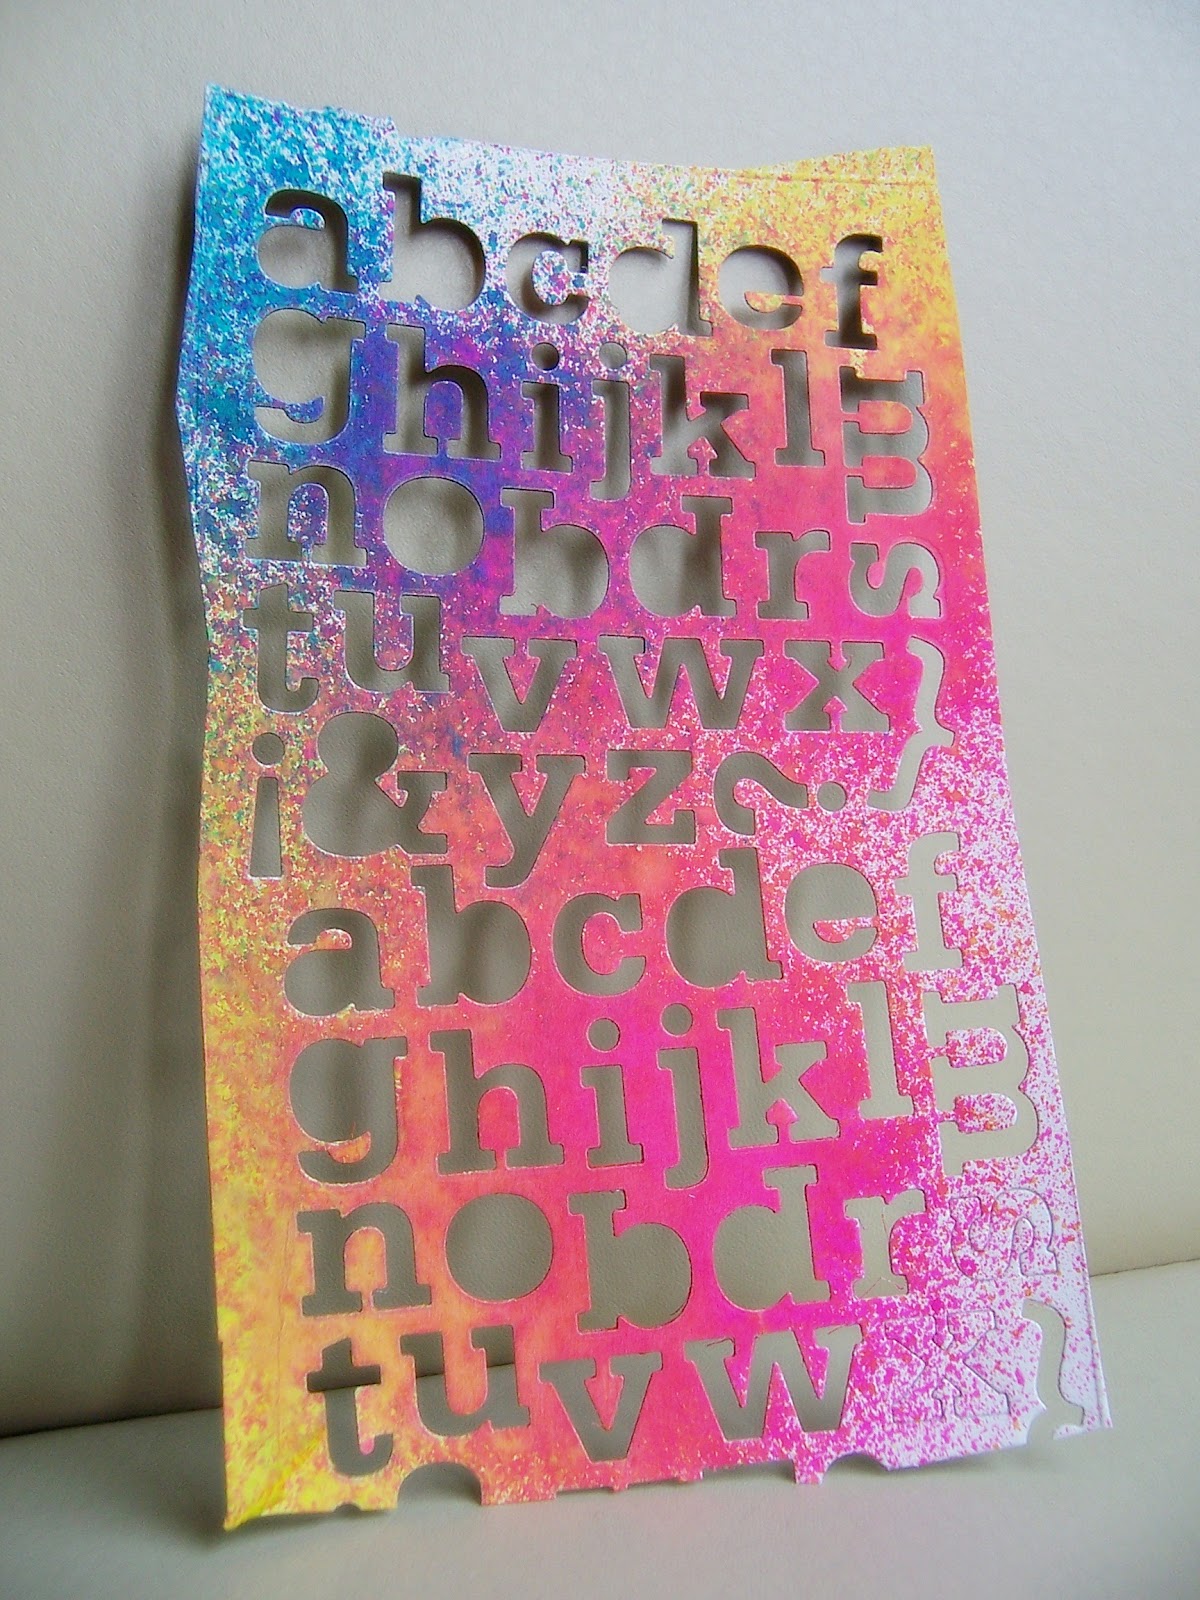
My latest fun... I'm playing with Three Cool Chicks and their trendy ideas.  Days 3 and 4 were about stencils and die cuts.  Ta da.  I am (since summer) the proud owner of an alphabet die.  And before I busted a couple individual letters out of the pack, I die cut the whole caboodle a couple times from chipboard.  Cuz ya never know, right?

Enter my luscious Dylusions ink sprays.  I sprayed over the negative and onto white CS.  Ta da.


My plan had been to use the white CS to make a card.  But my wannabe-artist-heart beat faster when I saw this abundance of gorgeous color plus typography.  I was almost more enthralled with the color-intense negative than the positive. What to do?  Then after taking these photos, as I laid the negative on the positive on my way back to my ironing board (read: crafting space), I had a lightbulb moment.  Intrigued?  Stay tuned for more - I got three cards outta these bad boys.

Here is #3, which was actually the third one I made but you get to meet him first ;)


Let me just say this was what I had leftover after #1 and #2.  Now the "hi" in the midst of other letters is no new thing.   Just new for me.  Thought about die cutting some shape out of this piece but I couldn't bring myself to cut off any of that scrumptious color except for a teensy bit around the edges.  So I cut my card base down to be a bit more square and attached.

I had cut the "h" and "i" out of some gold CS (like I said, stay tuned!) and decided I liked the shape of the negative.  Looks kinda like a house, doesn't it?  Stuck it on and stitched for some interest.  The bottom edge needed something.  Not sure I like my solution, but oh well, now it has "something"!  Popped a little scrap of gold behind a few of the holes too.  See?


So, once again thanks to Yvonne, Amy and Julie for all the fun I'M having ;) Check them out if you haven't yet.


So that's my Soup and Nuts for the Tuesday Trigger photo over at Moxie Fab.


And how about one more shot at Simon Says Stamp's Anything Goes challenge?


Supplies hi:
Paper: card base Buttinette, recycled chipboard, gold CS Ursus
Stamps: none - wow!
Ink:Dylusions ink spray
Tools: die PTI, border punch Fiskars
Other: sewing machine


Saturday, September 29, 2012

reflected sentiments (MIM, PDCC, YCU)

Another fun thing to try - reflected sentiments a la Becky V. over at Papertrey's Make it Monday.  You stamp onto a piece of acetate and then use the stamped acetate to stamp the reflection on the card.

I really like the Christmas card Betsy made.  Here is my take:


Looks kinda Christmas-y doesn't it.  Have to actually READ it to get it.  I went with some text stamps from Cosmo Cricket because they had flat bottoms and didn't look totally perfect to begin with.  I feared my reflected stamping might not come out perfectly.  And it didn't.  But it's Halloween.  That's cool.

I used the color scheme from Play Date Cafe #151 to mix things up a bit too.


Notice the faint hexagons.  Trendy, eh?  Just like the gals over at Three Cool Chicks.  Day #5 was about hexagons.  Here they are.

And since this technique was totally new to me, I'm playing along with Young Crafter's Unite Challenge #14 to Learn Something New.

Thanks for your visit.


Supplies BOO:
Paper: card base Buttinette, CS Neenah & Papermania
Stamps: PTI, sentiment Cosmo Cricket
Ink: Memento, Amuse Studio
Tools: acetate
Other: 


Thursday, September 27, 2012

wa shi doin? (Three Cool Chicks, SSS)

Yeah, what AM I doing?  This is so much fun.  Be crazy.  Think outside the box.  Join in.

I'm playing with Three Cool Chicks this Trendy 2 week and one topic is WASHI.  (How could you have a "trendy" week without washi, eh?)  Another is STENCILS.  Read:  achieving the effect even without a stencil...

This was one of those cards that materialized out of some crannies of my noggin.  No clue.  Just the creative process at work, I guess.  Start with a piece of cardstock.  Lay some strips (the ones you'd usually throw away after trimming) in a haphazard pattern.  Give a couple squirts of yummy Dylusions spray ink.


Remove the strips and give it one squirt of Bubblegum Dylusions.  Oh how cool.  I really feel like an artist when this happens!


Attach washi tails to paper clips, put the paper clips onto a die cut circle - notice that adorable KITSCHY PP I got at Aldi - and attach that to the card.


Glue panel to card base.  I put a little strip of tape along the bottom edge of my card.  BTW this is actually cello tape with a pattern.  It's shiny but still transparent.  Permanent when you put it on the paper.

I stamped my sentiment and attached it with some more washi.  Figured this would be a fun thank you card since the recipient would get some fun paper clips to keep.

Never ever would have come up with this on my own.  Thanks Three Cool Chicks, especially Julie T.W.
Joining the masses over at Simon Says Stamp's "Anything Goes" challenge cuz this definitely fits the ticket.  Those ladies are so nice.  They make it around the hundreds (thousands?) of entries they get and leave comments.  Then again, with a whopper prize like that, you're askin' for it ;)

Thanks for looking.


Supplies thanks:
Paper: card base Buttinette, CS Neenah, PP Bringmann
Stamps: sentiment Jane's Doodles
Ink:Dylusions ink spray, Adirondack
Tools: die MFT, corner rounder EKS
Other: paper clips, washi


Tuesday, September 25, 2012

what's the opposite of hoarding? (Three Cool Chicks, PTI)


So is it dehoarding?  Or unhoarding?  Using up my hoard.  Whatever.

What a cool theme for a blog hop over at PTI.  "Felt and Fabric Wrap."  How cozy does that sound?  And do you know the Three Cool Chicks who are getting trendy this week?  These ladies rock.  And they are brave souls who admitted that they're hoarders.  (I usually wimp out and say I "recycle...")


Anyhoo, friend's birthday is coming up Friday.  Got her a Brothers Grimm book (whole nother story) - so figured it was time to give it a wrap.

I am thrilled to present:


Cuz I love me some polka dots.  And lots of "recycling".  Where, you ask?  Packing paper, lace curtain flower layer, wall tatoo flower stems, cookie packaging corrugated white cardboard die cuts.   And for me nothing is more signature PTI than those little die cuts...  They were part of my first PTI order this summer.

New items include the fabric (which my friend will certainly use again cuz she's good like that ;), felt and buttons.  And technically the red yarn, although I've had that for a bazillion years.

Thanks for hopping by.  Looking forward to seeing what you wrapped up.


Supplies gift wrap:
Paper: recycled packing paper, cardboard, wall tatoo
Stamps: 
Ink:
Tools:dies PTI
Other: fabric,  yarn, felt & buttons Sew Sweet