Tuesday, March 31, 2020

STAMPlorations inspiration #261

Because March has five Tuesdays, I'm back with one more Tuesday inspiration from the STAMPlorations inspiration team!

This month I've been creating cards all inspired by a card I saw last month that just took my breath away - the central design idea being "something framed on an inked background". Today ... well, if you saw last week's card you'll understand where today's originated.

I had chosen the dragonfly die as a potential candidate for the "something" but hadn't used it yet.

Distress inks - Cracked Pistachio, Evergreen Bough, Broken China, Blueprint Sketch

So there I was following the same design process, though trying to make it more masculine. I decided to go with the dragonfly but instead of die cutting and watercoloring, I'd dry emboss them on the distress inked BG. And pop on a clear sticker sentiment and call it good.


Subtle dimension, but it's cool. Hope you enjoyed this month's series.

You could win yourself a $10 GC to the store by leaving a comment on this month's inspiration posts! Check out today's post over at STAMPlorations. And if I ever inspire you to order something from the store, I'd really appreciate it if you used my STAMPGIRLMARIA discount code for an additional 20% off your order - at no extra cost to you, just with perks for me ;)

I've used the dragonfly on this card too.

Thanks for stopping over today. Have a great week.

Tuesday, March 24, 2020

STAMPlorations inspiration #260

Back with  another Tuesday inspiration from the STAMPlorations inspiration team!

This month I've been creating cards all inspired by a card I saw last month that just took my breath away - the central design idea being "something framed on an inked background". Today ... I gotta say this card took my breath away.

Zig clean color real brushes
Distress inks - Cracked Pistachio, Twisted Citron, Mermaid Lagoon, Blueprint Sketch

So there I was following the same design process, though trying to make it more masculine. I decided to go with the bird die cut and use blues and greens to watercolor them. The first WOW moment came when I spritzed the watercolored birds with perfect pearls mixture. Look at that lovely texture that happened!

So I'd seen Laura B create with her favorite cool DI colors so thought I'd give them a go on my BG. Well HELLO! May I just say there should be more Twisted Citron in the world!

You've heard me say this before, but when I had that BG inked, I just couldn't dry emboss it or splatter it or cover it up too much with a frame and sentiment. Adios this month's design!


So my creative session went from my first card totally CASEing TaeEun's card to this! This is my favorite this month.

You could win yourself a $10 GC to the store by leaving a comment on this month's inspiration posts! Check out today's post over at STAMPlorations. And if you're placing an order at the store, I'd really appreciate it if you used my STAMPGIRLMARIA discount code for an additional 20% off your order - at no extra cost to you, just with perks for me ;)

For a different way of using these birds, check out this card.

Thanks for stopping over today. Have a great week.

I'm stopping over at:
Die Cut Divas - Anything Goes
Watercooler Wednesday - Masculine twist
Bastel Traum - Spring
bastel-traum( Sponsor)
Happy Little Stampers - AG with Dies
Pinspirational - Spring

Wednesday, March 18, 2020

STAMPlorations digital stamps with patterned paper

I'm over on the STAMPlorations blog today with five digital stamp projects. You could win a $15 GC to the store for comments left here and there. Just sayin...

So as I mentioned in my last Digital Wednesday post, I'm a newbie to digital stamps, but there are definitely some benefits to digi stamps - no smudges, perfect coverage without a MISTI, image resizing, even layering images (though I've yet to give that a try).

My technology tools are limited to Microsoft Word and my Canon ink jet printer. I watched this video for a great intro to digi stamps.

For today's projects I used a pad of patterned paper from the dollar store. The pastel colors caught my eye. The paper is thin however, so to print on it I used cellophane tape to attach the 6x6 sheets to a normal sheet of copy paper. This went through my printer without any problem.

TIP: First I print the image onto copy paper and then hold that up to the light with my 6x6 PP in front of it to see where I would like the image to be. (See how I lined up the flower on the floral PP so that one of the red roses was in the center of the bloom?)

Here's a look at the PP pad and some of the images I printed.


Another TIP: I use Photoscape to edit photos. I'm no pro. But since I knew I was only using the bloom from the latte-cup-with-bloom image, I cropped the image to remove the top portion of the to-go cup. This was then what I printed to waste less PP. (As if I don't already have enough PP to last 300 years...)

Let's get to my cards, shall we? First up, I used a cup of blooms image and thought I was going to mix and match cup and blooms - paper piece just the mug from PP onto the image printed on white cardstock and then give the white blooms just a little dab of color. But I liked the look of the image on the watercolored-look PP so much I couldn't cut it apart! So these two cards happened.

For the first, I fussy cut the image printed on Neenah solar white, added dabs of color to the flowers and adhered it on a floral PP.


Cupful of Blooms digi stamp
alcohol markers
patterned paper

Then for the second card I added color to the centers of the flowers on the image fussy cut from the pretty watercolored-look PP and added it to a shimmery, linen texture cardbase.

TIP: Look for pencil colors fairly close to your PP colors to keep the contrast minimal. I used a pink, a purple, a blue, a gray and a green cuz they were closest to the tones of the watercolored-look PP.


Cupful of Blooms digi stamp
Prismacolor colored pencils
patterned paper
embossing powder

For my next card I used an image that covers the front of an A2 card. I printed it once onto white cardstock and once onto PP. When fussy cutting the blooms from the PP to paper piece on the other panel, I carefully cut out the frame too.

TIP: When I fussy cut the flowers touching the frame on the PP panel, I made sure to leave the thick black line around the frame intact. This enabled me to use the frame for a second card. In general when paper piecing, fussy cut on the black line. Since you will be adhering the fussy cut piece to a stamped or printed image, those outlines will show.


I lightly applied some Spun Sugar and Squeezed Lemonade to the Neenah panel before adhering the PP flowers. Then I stamped the sentiment and added some sequins.


Coffee Blossoms digi stamp
Distress inks
PP, sequins

To accompany the fussy cut PP frame, I shrunk one of the other coffee cup images, printed it onto contrasting PP (twice so I could see which size I preferred) and fussy cut just the flowers to use to embellish the second card. (This was when it dawned on me to use Photoscape to crop the image so only the part I need would print and I wouldn't waste PP ;)


Added a sentiment in the form of a clear sticker to the frame. And colored the leaves of the flower spray and added gems too.

Coffee Blossoms digi stamp

This last card was such fun. I printed the image (sized to my liking) onto four different patterned papers, felt like I was back in kindergarten as I fussy cut the flowers and then arranged them on my cardbase.


TIP: Use the bits and pieces you trim off around the edges to fill some of the white space on your cardbase. I only had four flowers but it looks like I used seven.

I did not add adhesive to the outer edges of the petals so there's some dimension. I love how the sequins fit perfectly in the flower centers. Adds dimension. And that sentiment die with the drop shadow adds even more dimension.


Holiday Lattes digi stamp
sequins

Whew. That was a lot. Don't forget to leave me a comment. And on my Digital Wednesday post here too, for another chance to win.

With card #1 I'm playing over at:
The Flower Challenge - Anything Goes
SSS Wednesday Challenge - Whatever the Weather (card's going to girlfriend who combats stress with coffee)

Tuesday, March 17, 2020

STAMPlorations inspiration #259

Back with  another Tuesday inspiration from the STAMPlorations inspiration team!

This month I'm creating cards all inspired by a card I saw last month that just took my breath away - the central design idea being "something framed on an inked background". Today I've got another take on it.

Action Deutschland embossing folder
Zig clean color real brushes
Distress inks - Dried Marigold, Spun Sugar, Worn Lipstick

I thought an ice cream cone could grab the edge of the frame (this time a circle). The background was distress inked and then debossed with sprinkles. Then I added a heat embossed sentiment strip.

Oh and splatters (BTW I use Dylusions white spray ink)! Do you have a favorite product for making white splatters? I'd love to know.


You could win yourself a $10 GC to the store by leaving a comment on this month's inspiration posts! Check out today's post over at STAMPlorations. And if you're placing an order at the store, I'd really appreciate it if you used my STAMPGIRLMARIA discount code for an additional 20% off your order - at no extra cost to you, just with perks for me ;)

For a different way of using this sweet set, check out this shaker card. Or this camoflaged one.

Thanks for stopping over today. Crazy how this cardmaking world of our remains a haven while the world around us rages out of control. I hope you and your loved ones are staying safe.


Monday, March 16, 2020

introducing new ARTplorations stencils from Helen G


The Inspiration DT is up over at STAMPlorations today featuring some of the fantastic new ARTplorations stencils designed by Helen G. Be sure to check it out.

I have three cards for you so let's get started. First up I used Petals to ink up and embossing paste up a panel which I then proceeded to cut apart ;)

Distress inks - Shaded Lilac, Wilted Violet, Blueprint Sketch
embossing powder


I wasn't really happy with the inked panel after I'd applied the embossing paste. This is dried up Nuvo paste I revived by adding water but it's changed some of its properties I fear and I didn't like how the center of the bloom looked. I thought I'd try cutting the image apart, adhering a few strips with dimensional adhesive and then covering the center with a nice, big die cut word! The inside reads "happy". I'm happy with the result.

Next up I figured I'd give two of the cool graphic stencils a go. I inked up a panel of Neenah CS with Twisted Citron, put down the Brick stencil and applied Cracked Pistachio and then put down the Rubber Bands and applied Mermaid Lagoon. Ta da!

Distress inks - Twisted Citron, Cracked Pistachio, Mermaid Lagoon


I die cut the panel into three manila tags and added a whimsical die cut tree to each. Added the sentiment and will use this as a sympathy card.

For my last card today I started with a gelli plate background from my stash. Stenciled the lovely girl, made a mask to stencil some roses onto her hair and then used embossing paste colored with acrylic paint through the Petals stencil to add interest to the corners.

Distress inks - Barn Door, Black Soot
aqua acrylic paint, embossing paste


Be sure check out the DT makes in the hop. Winners will be drawn randomly from all comments left on the STAMPlorations blog and designers blogs. One person will win all 6 new Helen G. Designs stencils, one person will win 3. Stay safe. Stay healthy. #flattenthecurve

Sunday, March 15, 2020

CAS cards challenge march reminder

Hope you're having a good day. I'm popping in today with a reminder about the STAMPlorations 
CAS Cards challenge. First, the inspiration.


It's anything goes with the optional color twist of light blue.  I though Vespa and this happened.

STAMPlorations Born to Roam stamp
MFT Radial Stitched Circle die
patterned paper
Copics

CAS card tip: "White space", so crucial to CAS designs, doesn't necessarily have to be white. Here I've used white for the circles but PP for the cardbase.

Stamped the image and sentiment. Die cut them and a PP circle. Adhered. Voila. I've also used this stamp set on this card.

I'm looking forward to your CAS card creations this month! Your project might be chosen as the winner of a GC to the shop. Check out how the DT was inspired by this month's photo here.

And don't forget about my STAMPlorations discount code STAMPGIRLMARIA for 20% off should you find yourself shopping ;)  Thanks for stopping by.

I'm stopping by:
CAS on Sunday - Boys and their Toys
ATCAS - Circles

ATSAM - #380


Thursday, March 12, 2020

spotlight on spin art - part 1

Hello there friends! I've got a super fun Spotlight project for you today over at STAMPlorations. It's a messy one. Have you heard about Spin Art? Have you tried it?

Here's a card I made using one of the backgrounds I made in my salad spinner.


And here's another.


Check out my tutorial - I even made my first-ever video for ya!

I'm taking the first card over to SSS Wednesday Challenge - Use Some Green. And the second to We Love 2 Create - AG Mixed Media and CAS Mix Up - 4th Anniv where it's about Acrylic Paint (even though my card may not be really CAS).

Wednesday, March 11, 2020

altenew march challenge

I had to join in over at this month's Altenew challenge. Norine is so inspiring, I love the colors she chose and add succulents to the equation... it was a no brainer!


And could I be more predictable? Mega Succulent here I come.

white embossing powder


I love how Norine did her BG so I mixed up some green, blue and purple watercolor and had some fun watercoloring the heat embossed image.

I decided to turn it into a sympathy card. Isn't that a great sentiment for those times when you're truly at a loss for words. The inside reads "sharing in your sorrow".

Then I made a totally different version using up the watercolors that were on my palette. I thought the purple in my first card seemed a bit too bright for the inspiration photo. And the blue touches on some of the leaves kinda disappeared. So I pulled out the flowers.

Altenew watercolors
white embossing powder

I heat embossed, watercolored and die cut the peony and leaves. For my background I stamped all the happy birthday sentiments as they are on the packaging, heat embossed them and did a light wash of green over them. And added some green splatters. And Nuvo drops. Figured the background did the talking so I skipped an additional sentiment.


Have you played along? Why not give these colors a try?

I'm joining the fun at:
The Daily Marker - 30 Day Coloring Challenge (first day in my craft room since it started)
The Flower Challenge - Anything Goes
Happy Little Stampers - Watercolor

Tuesday, March 10, 2020

STAMPlorations inspiration #258

Back with  another Tuesday inspiration from the STAMPlorations inspiration team!

This month I'm creating cards all inspired by a card I saw last month that just took my breath away. Did you see this beauty by TaeEun?  Last week I totally CASEd her card. Today I've got my own take on it.


The central design idea being "something framed on an inked background" - I went neon this time.

Make life easy by swiping ink directly onto the cardbase. Use border dies to create your own wonky frame. Roughly ink up a large word die cut the same way as your BG. Add splatters and voila!


You could win yourself a $10 GC to the store by leaving a comment on this month's inspiration posts! Check out today's post over at STAMPlorations. And if you're placing an order at the store, I'd really appreciate it if you used my STAMPGIRLMARIA discount code for an additional 20% off your order - at no extra cost to you, just with perks for me ;)

For a different way of using this word die, check out this card.

Thanks for stopping over today. Have a great week. I'm stopping over at Die Cut Divas - Anything Goes, SSS Wednesday - Something Feminine and Happy Little Stampers - AG with Dies March.


Thursday, March 5, 2020

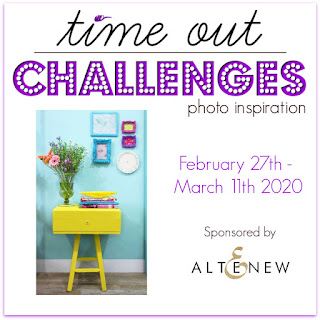
guest designing at time out #156 - reminder

Popping in today to remind you about the photo inspiration challenge over at Time Out . Lucky me, I get to guest design with the talented DT this fortnight. Here's the fabulous inspiration.


I just love how that fresh yellow pops off the aqua, especially with those touches of white. (BTW, you can see a larger version of the photo over at Time Out.)

This challenge is kindly being sponsored by Altenew. I can't help but think of florals when I think of Altenew. Agree? I headed to my stash (whistled... ;) inside joke for Darnell) and took a look at my florals. I discovered that I had some leftover blooms in with the die and wouldn't you know it, the colors fit the bill. They're the colors of those cute frames on the wall in the photo.


All I needed to do was adhere the blooms on the background, a piece from my BG stash made by cleaning up some metallic gelato-y messes awhile back. And then die cut a sentiment from lemon yellow CS to mimic the console.


Again, thanks to Sandie and the design team for having me. It's such fun to be part of the inspiration post for this month's photo challenge. Have you played yet? I'm looking foward to seeing your entries in the gallery.

I'm joining the fun at:
Die Cut Divas - Anything Goes
Love to Create - AG Mixed Media
SSS Wednesday Challenge - Something Feminine
The Flower Challenge - Anything Goes


Related Posts Plugin for WordPress, Blogger...