Wednesday, August 31, 2016

color blooms blog hop


Ready for loads of fun - as in, take you back to your childhood days kinda fun? As in, get out your box of 64 Crayola crayons and pull out that "Magenta" kinda fun!

Today the STAMPlorations girls are hopping to show you what we've been doing with Color Blooms, the coloring book loaded with Shery's floral designs which you can order here.

You should be sure to leave lots of comments to have a chance at a prize, including Color Blooms. And, you should color. There's a linky party where you can hook up a project you make using the free Color Blooms sampler which you can find here.

Today I've got two cards made with Color Blooms. Big and bold. With my kids' hand-me-down Rose Art markers! Nothing fancy happening here folks. Just lots of relaxing fun. This shot shows Copics too, but it ended up just being me, my waterbased markers, a couple black Sharpies and Color Blooms and a few hours out on the screened porch.


One page yielded four cards! I've posted two cards I made with Color Blooms WITHOUT coloring. Used those two lower sections of the page. You can check them out here.

Here's my first colored specimen.


Grabbed a handful of pinks, purples and blues and colored away, only leaving the outer petals of each bloom white for better contrast. Die cut the section with Crazy Stitched Rectangles. Glued it onto some scrap white CS and die cut Smile from it and from craft foam. Adhered the panel to my cardbase. Popped in the raised "smile" and added a heat embossed sentiment from Sentiment Builders: Christmas. Adhered a scrap strip of blue paper beneath it. Can you find Waldo? ;)


Remember how I glued the colored panel to cardstock to give it more strength before die cutting? On this card I took advantage of the thinner paper and did some layering with it.


Again here I chose a handful of my favorite colors from the last card and added some bright yellows too. When coloring with waterbased markers if you apply too much color the paper will begin to pill, so I only added a second layer of the same color color around the center of the blooms for a bit of depth.

TIP: I used the matching bloom stamp from Floral Bliss to stamp around the edges of my cardbase before adding the black and Color Blooms layers (die cut with Crazy Stitched Rectangles.) Added a metallic Hugs die cut popped up on craft foam and voila! Love the slightly curled edges of the lighter layers!


Thanks for coming by. Hope you're enjoying the hop and I look forward to seeing your colored creations in the linky party over at STAMPlorations. You have through September 6th to link up.

I'm hooking up over at Simon Says Stamp's Wednesday challenge where it's Anything Goes this week.

Monday, August 29, 2016

ellen hutson pin-sights challenge

I always love the mood boards Laurel puts together over at the Pin-Sights challenge at Ellen Hutson classroom. This month is no different. Notice those white chairs lined up in a row with thoses pops of pink. And the white-on-white place setting...


I paired it up with #187 over at CASe this Sketch.


And kept these sympathy cards (needed one feminine, one masculine) super CAS.


Used a 1" circle punch and Memory Box Parker alpha die. The bright spots on the cards are thanks to #essentials by Ellen Wild Garden and Gourd-jus dies. Thanks for visiting. Just noticed this is my 1000th blog post. Geesh. Sounds like a good time for a giveaway...

Saturday, August 27, 2016

using coloring book pages

Coloring books. All the rage in all the stores I visited in the US. And now I get it. It's SOOOO relaxing to color. Takes me right back to my childhood days - me, a coloring book and my box of Crayola 64!

Just keep watching cuz there's a blog hop coming your way on August 31st where you'll see tons of inspiration using the new Color Blooms coloring book from STAMPlorations. I've got two sneaks for you today.

I brought back some dreamy Altenew products with me this trip and decided to have a play at the August challenge over there. Here's the inspiration.


I chose a page to color from Color Blooms that features one flower but is divided into four panels. I opted NOT to color two panels and see what I could do with them.  Here's option #1.


Using my new products, Wild Hibiscus and the Red Cosmos mini inkpads (Coral Berry is a fabulous color and oh-so-flamingo!) I stamped my cardbase. Added a heat embossed sentiment and then just fussy cut a grouping of blooms from the coloring book page and adhered them, leaving the edges unattached so there is some lift to them. See?


For option #2 I got a little zentangled.


Used a black Sharpie to add pattern to some of the blooms. For this option I chose the panel with some text in the BG to ensure white space, and then I even left the outer petals of the blooms white for even more! You'd get a completely different but also cool look if you zentangled everything.

To bring in the "flamingo" I swiped three strips of CS with the pinky tones from Red Cosmos, adhered them to CS and die cut CUTplorations Smile. Added a heat embossed secondary sentiment from Persian Motifs and an enamel sticker. Thought it mimicked a flamingo's beak ;)

Hope you like what you see here. Come back for the blog hop on the 31st for more ideas, won't you?

Friday, August 26, 2016

did someone say pastels, earthy oranges and a pop of navy?

Why yes, someone did. Are you participating in this month's Papertrey Ink challenge blog hop? This is the inspiration. Which I only saw this evening.


And it just so happened that I was playing with shaving cream and acrylic paint this evening.


So I thought to myself, why not give pastels and orange and navy a try? So I did. A couple times. And this one with the nice peach blob top right happened.


So I turned it into this card, using my new Butterfly Cover plate and Hugs dies and some peach fun foam. Kinda wild, eh?


 Well, time for me to get to bed. I've always loved the notion of "butterfly kisses". So how about "butterfly hugs"? Nite. Tomorrow I'll hop around and see what everyone else has come up with!

ETA: Got the shaving cream technique from The Male Room challenge. Not sure this card qualifies as masculine, but I'm joining the fun over there. You can check out some videos on the technique there too.

Thursday, August 25, 2016

the succulents have landed

So have I! It's adios vacation and back to normal life in Germany for me. Which includes unpacking my suitcase. And organizing all my new stamps and dies and inks that came back in it ;)

My very first Waffle Flower product just happens to be this succulent stamp I fell in love with. And did you see the current challenge at The Heart Desires?


Succulents and geometrics. Yum. Here's what I did.


 I should mention I also took a glance at the current Waffle Flower challenge and pulled my colors from it. Stamped the Winnie and Walter Multifaceted randomly with yellow - see that pillow on the sofa below? Used some PP from a new (yes, I did bring home two small PP pads - need them like I need a hole in my head) Studio Calico pad. And the dark strip along the bottom was from a kleenex box - thought the dark mimicked the dirt and the fireplace well.


Heat embossed the potted succulents with green (thanks WOW! Embossing Powder for my win a couple months back!!! I'm joining this month's challenge too) on vellum and fussy cut. In a nod to the rounded pots of the succulents and the wicker tray on the wall above the fireplace, I die cut a circle from PP to back the vellum with. Added a couple leaves from Essentials by Ellen Gourdjus cut from shimmer cardstock. And finished the front with "happy" from Papertrey.


Think I was channeling my inner Kate with those layers ;)

A STAMPlorations happy happy birthday sentiment is included on the inside, along with another circle die cut from my kleenex box ;)

Thanks for coming by today and always. I really appreciate your visits ♥ CU soon.

Tuesday, August 23, 2016

STAMPlorations inspiration #92

My card for today's inspiration post started out trying to be a card like this one.


But alas, things took a different route.


Several techniques at work here: heat embossing Sketched Birthday Cake and a secondary sentiement from Blossom Overture, die cutting Hugs.  If you want to know more about the detour, check out my spotlight post on the STAMPlorations blog tonight ;)

You can check out the rest of the DT's inspiration here.

I'm hooking this guy up at Seize the Birthday where it's Anything Goes!

Monday, August 22, 2016

MMCC #26 - reminder

I'm easing back into things here, now that I've returned from a wonderful summer break in Michigan. But since we're featuring everyone's favorite over at the Mixed Media Card Challenge - RAINBOW I had to pop in with this card.


I've used alcohol inks in rainbow colors for you today.


I trimmed a panel of glossy CS and dripped rainbow colors of alcohol inks onto it! Voila!

Then I dabbed some gold color alcohol ink mixatives onto a few areas and stamped the roses and leaves from Altenew Painted Flowers onto the gold areas. Did some touch-up on the centers with a black Sharpie.

I adhered a piece of purple glossy paper askew on my cardbase and then the glossy panel askew over that. Topped it off with a Dymo label sentiment, keeping the glossy trend going!

Join us for some mixed media rainbow fun, won't you? The challenge is open til close of day on August 25th.

I'm joining the fun at:
Addicted to Stamps and More - make your mark (lots of blobs with alcohol inks and touch-up work with a Sharpie)

 CASual Fridays #154 - time to color (hope time for color works too)
Seize the Birthday - anything goes


Tuesday, August 16, 2016

STAMPlorations inspiration #91

It's time for another inspiration post over at STAMPlorations. I chose to give the tiniest stamp from Kathryn's Big Wishes a work out.

On a die cut wonky panel I stamped using that little confetti stamp. However I used Zig Clean Color Brush Pens to ink up the dots, using multiple colors and only randomly coloring some of the dots each time I stamped. Clear as mud?

After I'd stamped my cascade of dots it didn't look so hot. So I spritzed twice with Perfect Pearls/water mix to get the colors moving a little, plus shimmer. Me likey.


I decided to mount the wonky panel at an angle, but stamped my secondary sentiment from Sentiment Builders Love first. Adhered the panel and then the CUTplorations Birthday.

I love all the blue tones and watercolor look. But I love all that white space most ;) Please check out the other inspiration here and remember to comment for your chance to win a $10 GC to the STAMPlorations store.

Monday, August 15, 2016

CASEplorations August - reminder

Just stopping in with a reminder that there we have this dramatic card to CASE over at CASEplorations this month. You can join us until the end of the month.


I kept it pretty darn simple this time.


Taped down my cardbase and used my Gansai Tambi watercolors to paint some navy lines. Stamped a secondary sentiment from STAMPlorations Blossom Overture. Die cut CUTplorations "Birthday" from neon red CS (it looks more orange IRL) and white craft foam and adhered them. Added a couple balloon sequins in a nod to Shalu's sequins. Basta!

I'd love to see how you CASE Shalu. Check out the gallery here. Thanks for stopping by today!

Friday, August 12, 2016

STAMPlorations august release hop


Welcome to the grand finale of the STAMPlorations August Release celebration! Not only do we have some cool stamp sets for you this release, but there are the new CUTplorations dies too! I'm still SOOOO psyched about those. Sure hope y'all like 'em so Shery will keep producing more and more ;)

Which brings about a new situation. Die cut stamped images. Hmmm. Tends to mean less focus on backgrounds and techniques, more focus on patterned paper and coloring. Yikes!

Well anything that forces me to use up some of my PP stash is a good thing. As for coloring, I broke out the colored pencils (before I had my Polychromos) and gave it a go.

Meet Buttercups and Butterflies.


Stamped the images in black and colored the buttercups with colored pencils. Die cut them with the matching CUTplorations die (how I love saying that!!!). I stamped the sentiment onto a die cut circle and arranged the items in a flow from bottom to top. The arrangement was taller than a standard card, so I made a tall card. Added a panel of older Jillybean Soup PP to my cardbase. And for interest I adhered the items at the top with dimensional adhesive.

Meet Birds of Paradise.


How fun is it to work with Shirley's crazy birds?!?! But first things first. For my background I die cut the largest of the three Crazy Double Stitched Rectangles and inked it up with Faded Jeans, Stormy Sky and a touch of Mermaid Lagoon for brightness. Then I splattered water. Then I spritzed it with my Perfect Pearls/water mix.

I stamped and die cut the birds and colored them with yellow, orange and red colored pencils. Added two sentiments which I fussy cut in the shape of clouds keeping with my sky background. I was thinking mama and baby bird, but I guess it could be well and sick too. Anyhoo, I adhered mama and her sentiment with dimensional adhesive for interest.

Meet Tweet Love.


The tails, folks. Did you notice those tweet tails?!?! OK, the PP was out so I went PP crazy on this card. Grabbed an Elle's Studio kit and played. Stamped the giraffe and ellie onto the smallest pattern -polka dot. Die cut two Crazy Double Stitched Rectangles, one from a mid-size pattern and one from a large pattern. Heat embossed a sentiment from Noteworthy onto a blue scrap and attached it with a staple. A few Freckled Fawn enamel drops finished off my card.

TIP: When you have the dies, don't forget to use them! As I was pulling the backing off of about 20 little foam squares on my crazy bird, it dawned on me I could have die cut the bird from craft foam instead. Duh. So that's what I did with these tweet animals ;)

Meet Bloom Happy.


I like so many of these wonderful sentiments, I decided to make a set of mini cards. Easy peasy. Truly. Cut cardbases for 9x18 cm. Adhered 13 Arts "Faces of Spring" to them and stamped each with a border from Artsy Border Maker in gray. Then I stamped the sentiments onto rectangles die cut with the Bloom Happy die from CUTplorations.

Check out what the rest of the team made! You'll find links to all our projects here. Prizes? Yep, so be sure to leave lots of comments before August 16. AND special for blog followers and August stamp spotlight week blog hop participants, from August 8 - 15 all orders of at least $12 ship free worldwide! Use code STAMPWEEK.

Thanks for hopping! Have a great day.

Tuesday, August 9, 2016

spotlight on scissors

Well, scissors and stamps and inks and Perfect Pearls mix. Check out my suggestion for giving your one layer cards a bit of a kick. I'm up with a spotlight post over at STAMPlorations.


STAMPlorations inspiration #90

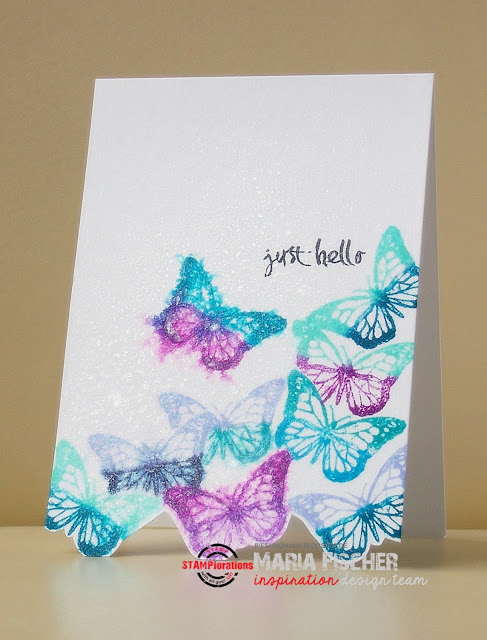
It's inspiration day over at STAMPlorations and I've got a rabble for you. I gave the butterfly from Gone Postal a good workout.


If you want to find out exactly how I created this card, check out my spotlight post over on the STAMPlorations blog this evening!

And don't forget to leave a comment over there to be in the running for a $10 GC.

Friday, August 5, 2016

CASEplorations August


It's CASEplorations time again, folks! And how about some navy and white striped goodness for August? This bold beauty is from Shalu of All By Art Creations. There's so much to work with on her card. I went with the navy and white stripes, an orange bloom, silver CS and thread and lotsa sequins.


I die cut a label tag and stamped grungy stripes from Mixed Media Elements onto it with navy pigment ink. I heat embossed the rose from Blossom Overture and watercolored it before fussy cutting. Die cut a sentiment from silver CS. Before I adhered the tag I stamped the frame and sentiment from the same set onto my cardbase. A messy nest of silver metallic thread and a liberal sprinkling of sequins (literally, I dropped them and glued them down where they'd fallen) finished off my card.

Please check out the rest of the DT's creations and join us in the gallery. It's open until end of day on August 31st. The DT's favorite will win a $15 GC and two runners-up win a $5 GC!
Related Posts Plugin for WordPress, Blogger...